Shopify Web3 Crypto Checkout
Sell and get paid seamlessly with crypto and digital wallets.
Watch the step-by-step video guide
Example
https://depay.com/shopify/demo
Step-by-step
Installation
Go to https://apps.shopify.com/depay and click "Install".
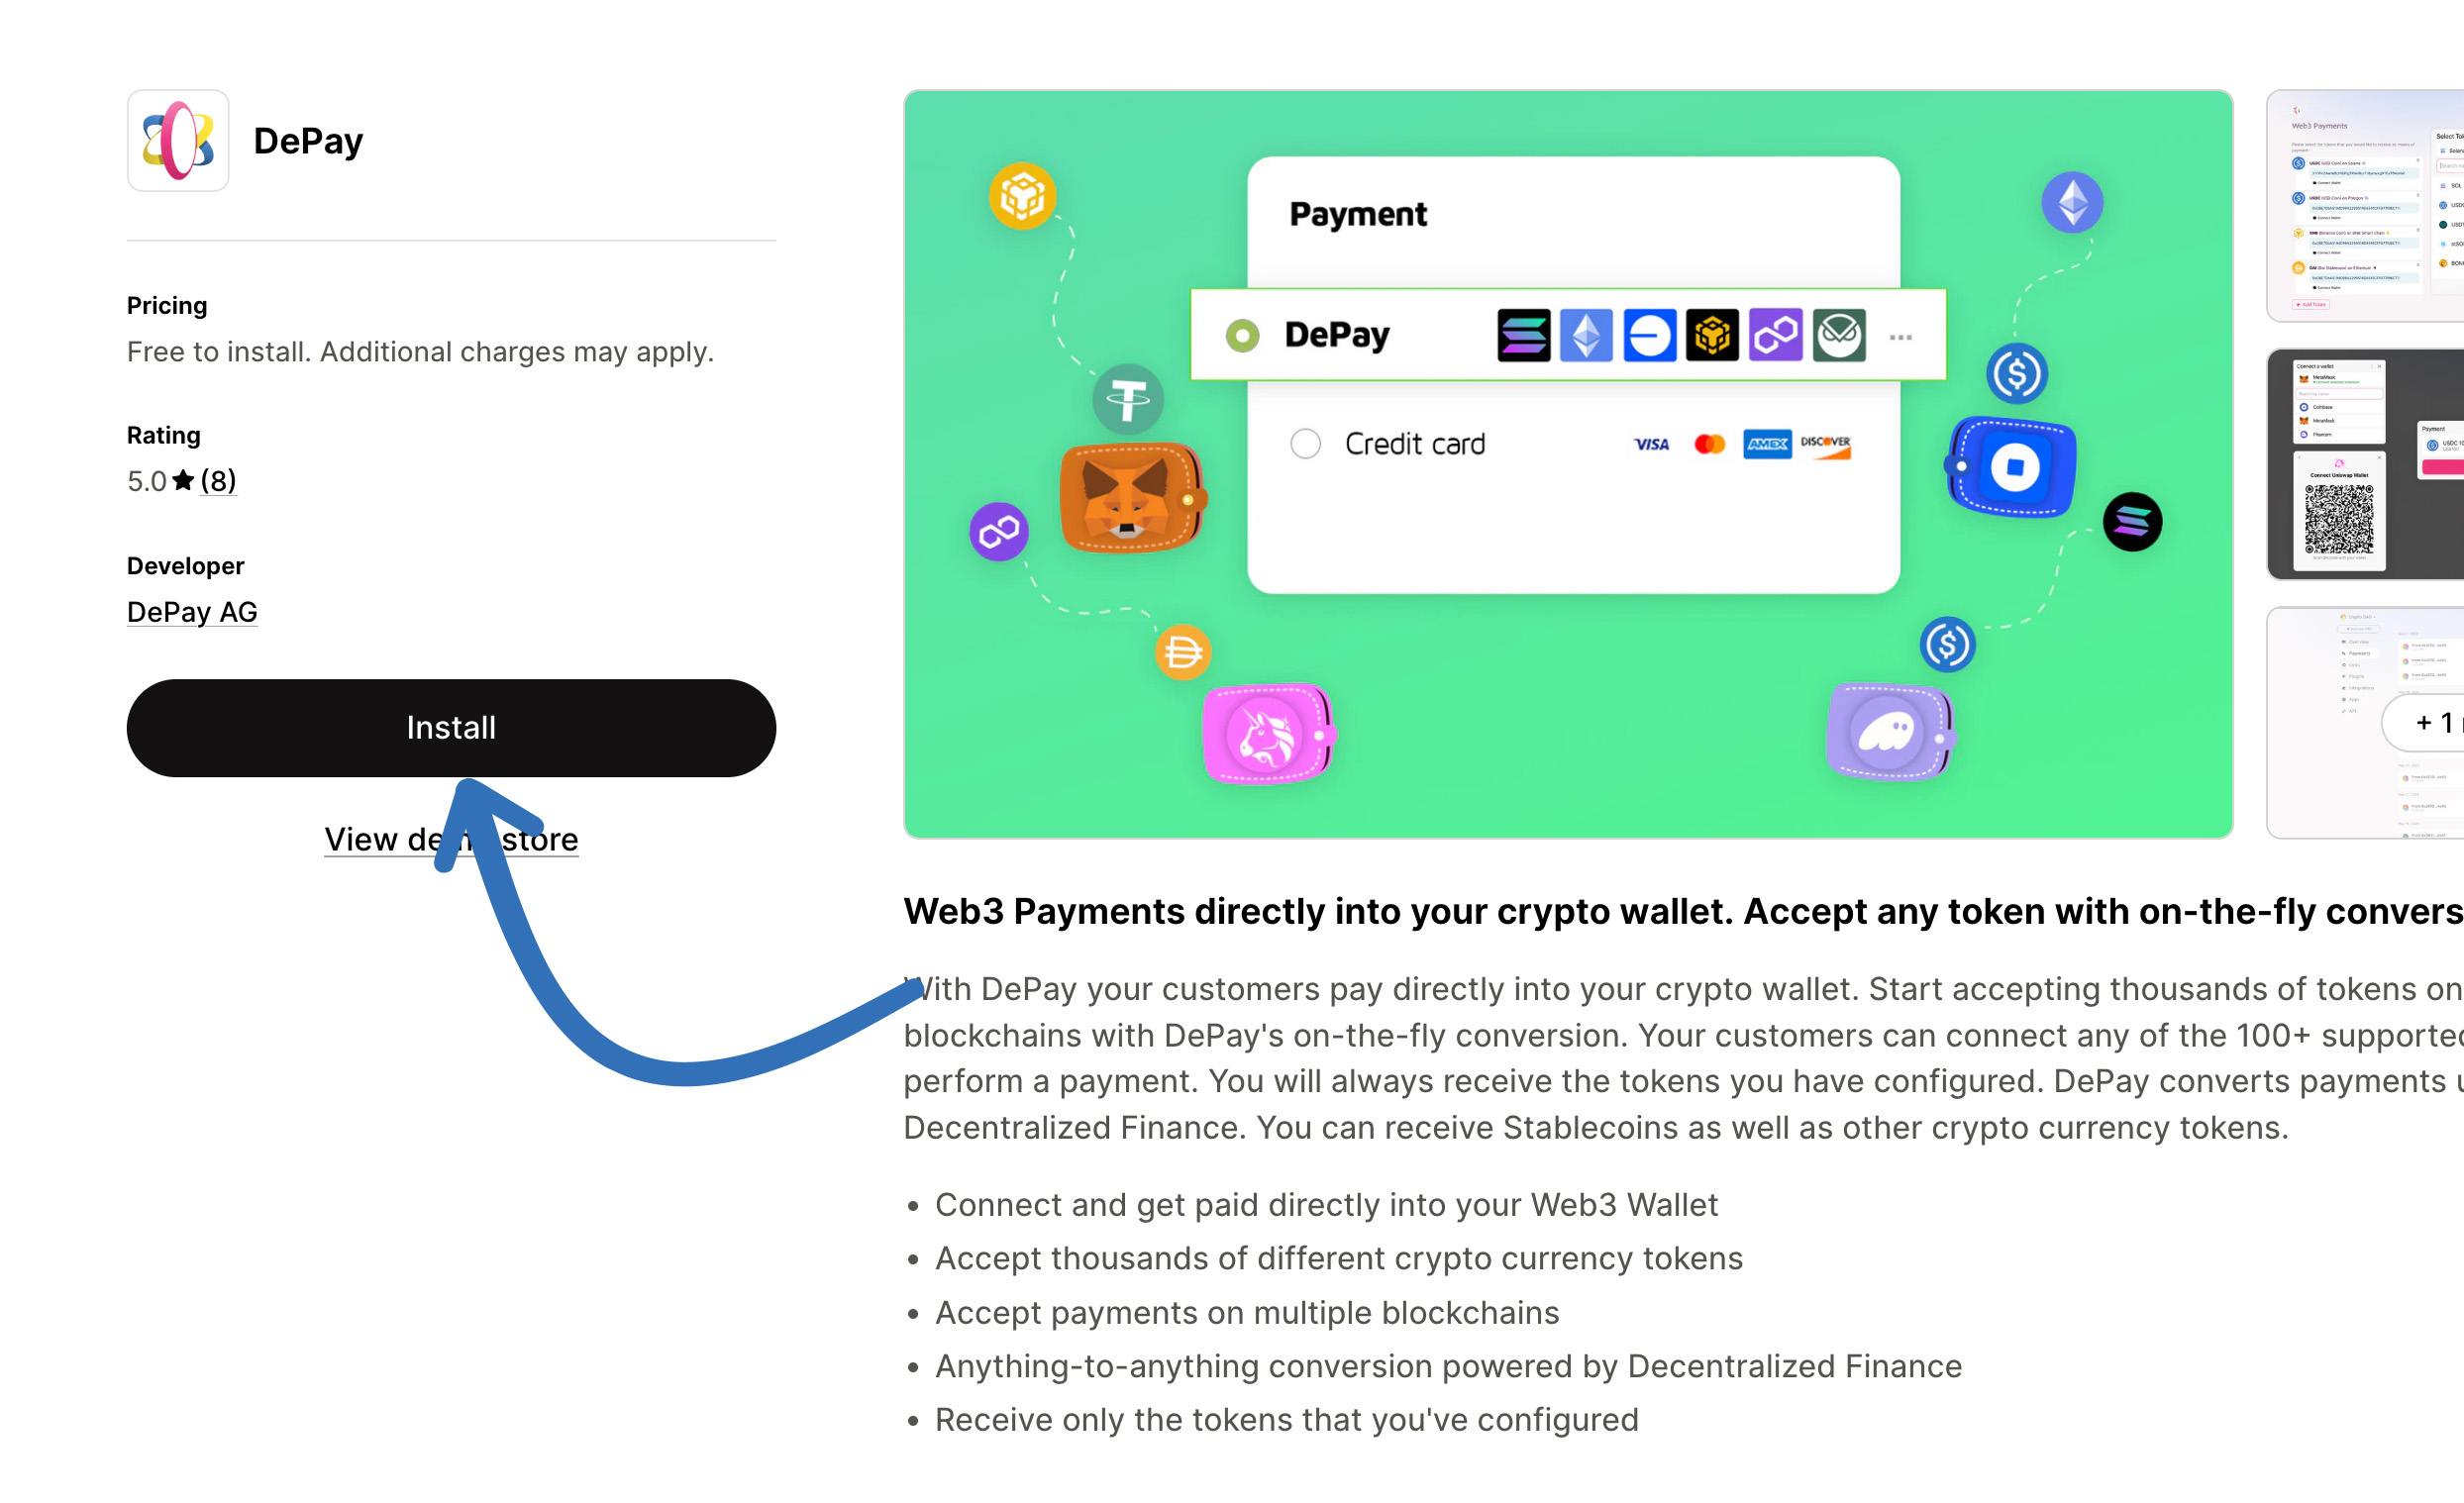
If you have multiple stores, make sure to select the correct one where you want to install DePay before clicking "Install".
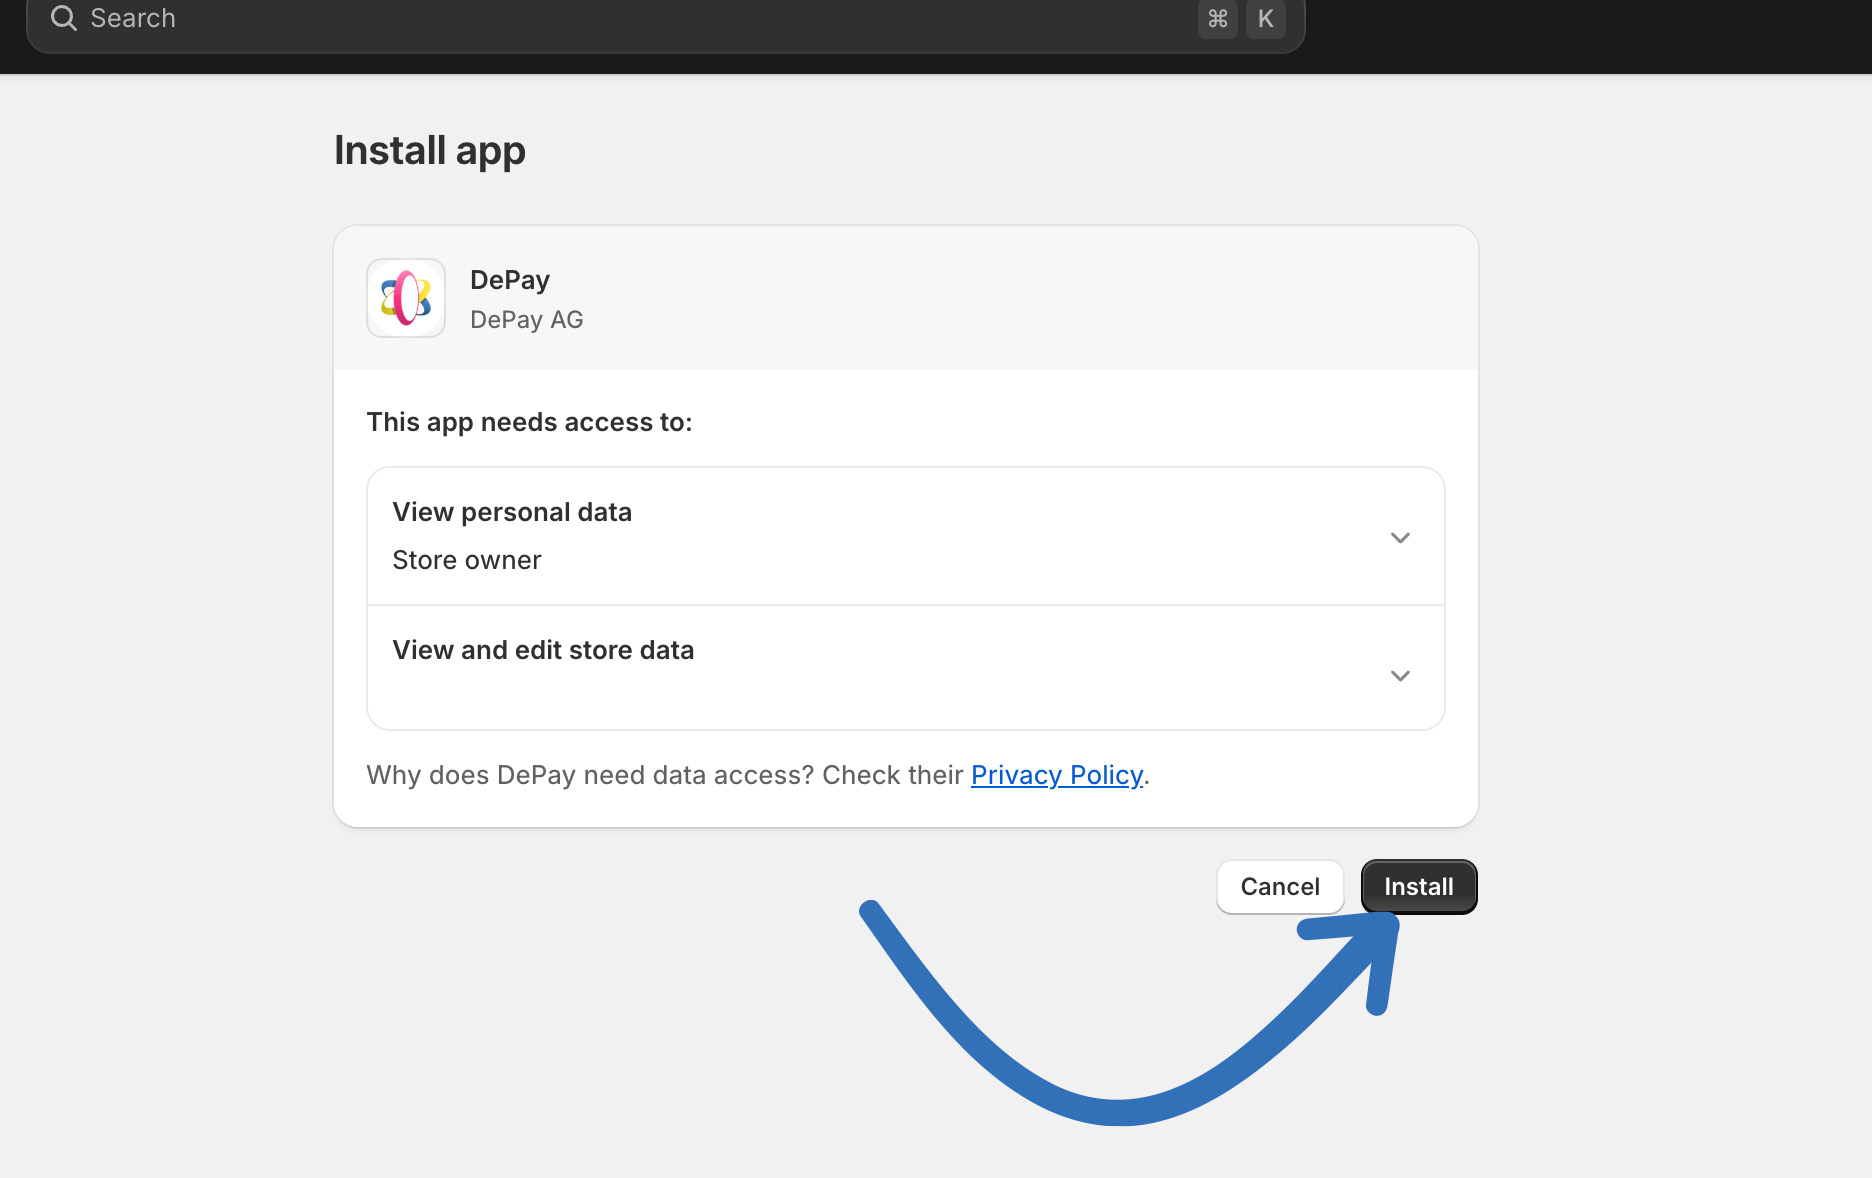
Click "Install" again to install DePay as a Shopify Payment Gateway:
Connect or Create your DePay Account
Log in to your existing DePay account or create a new one.
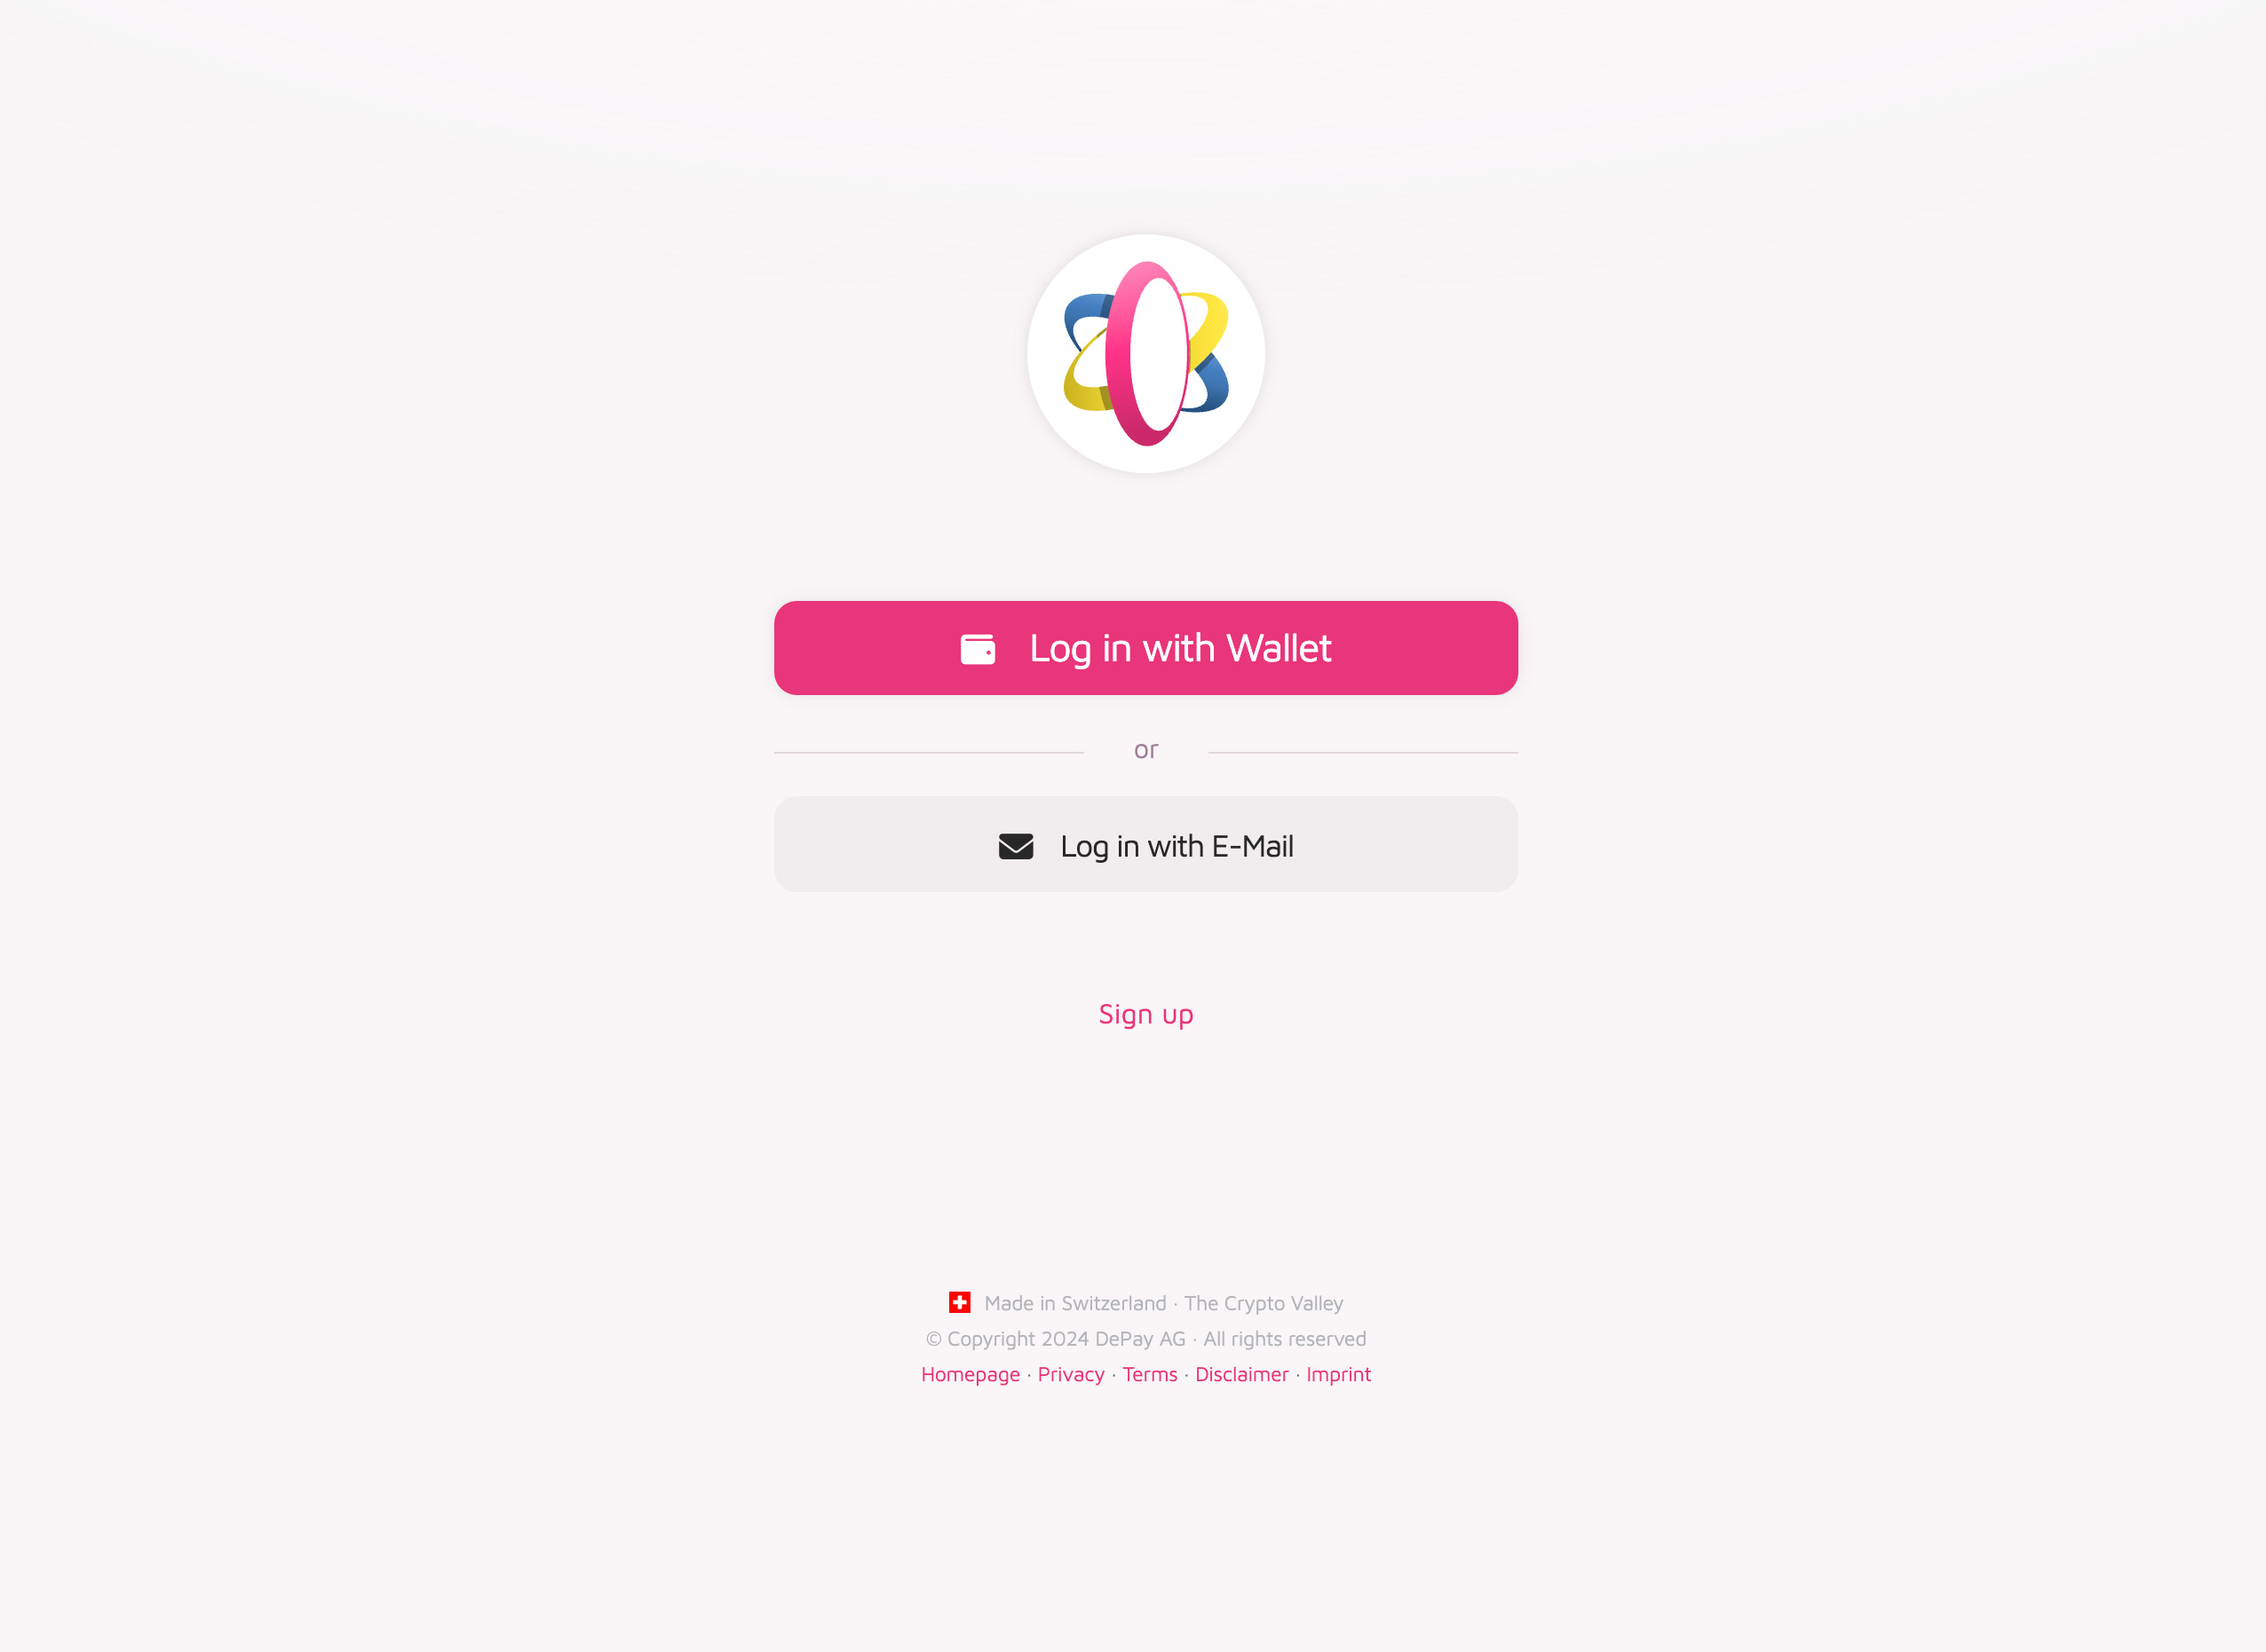
Your account will be automatically linked to your Shopify store.
Select Tokens
Now select the tokens you'd like to accept as payment:

We recommend selecting as few tokens per blockchain as possible. DePay’s auto-conversion allows customers to pay with a wide variety of tokens regardless.
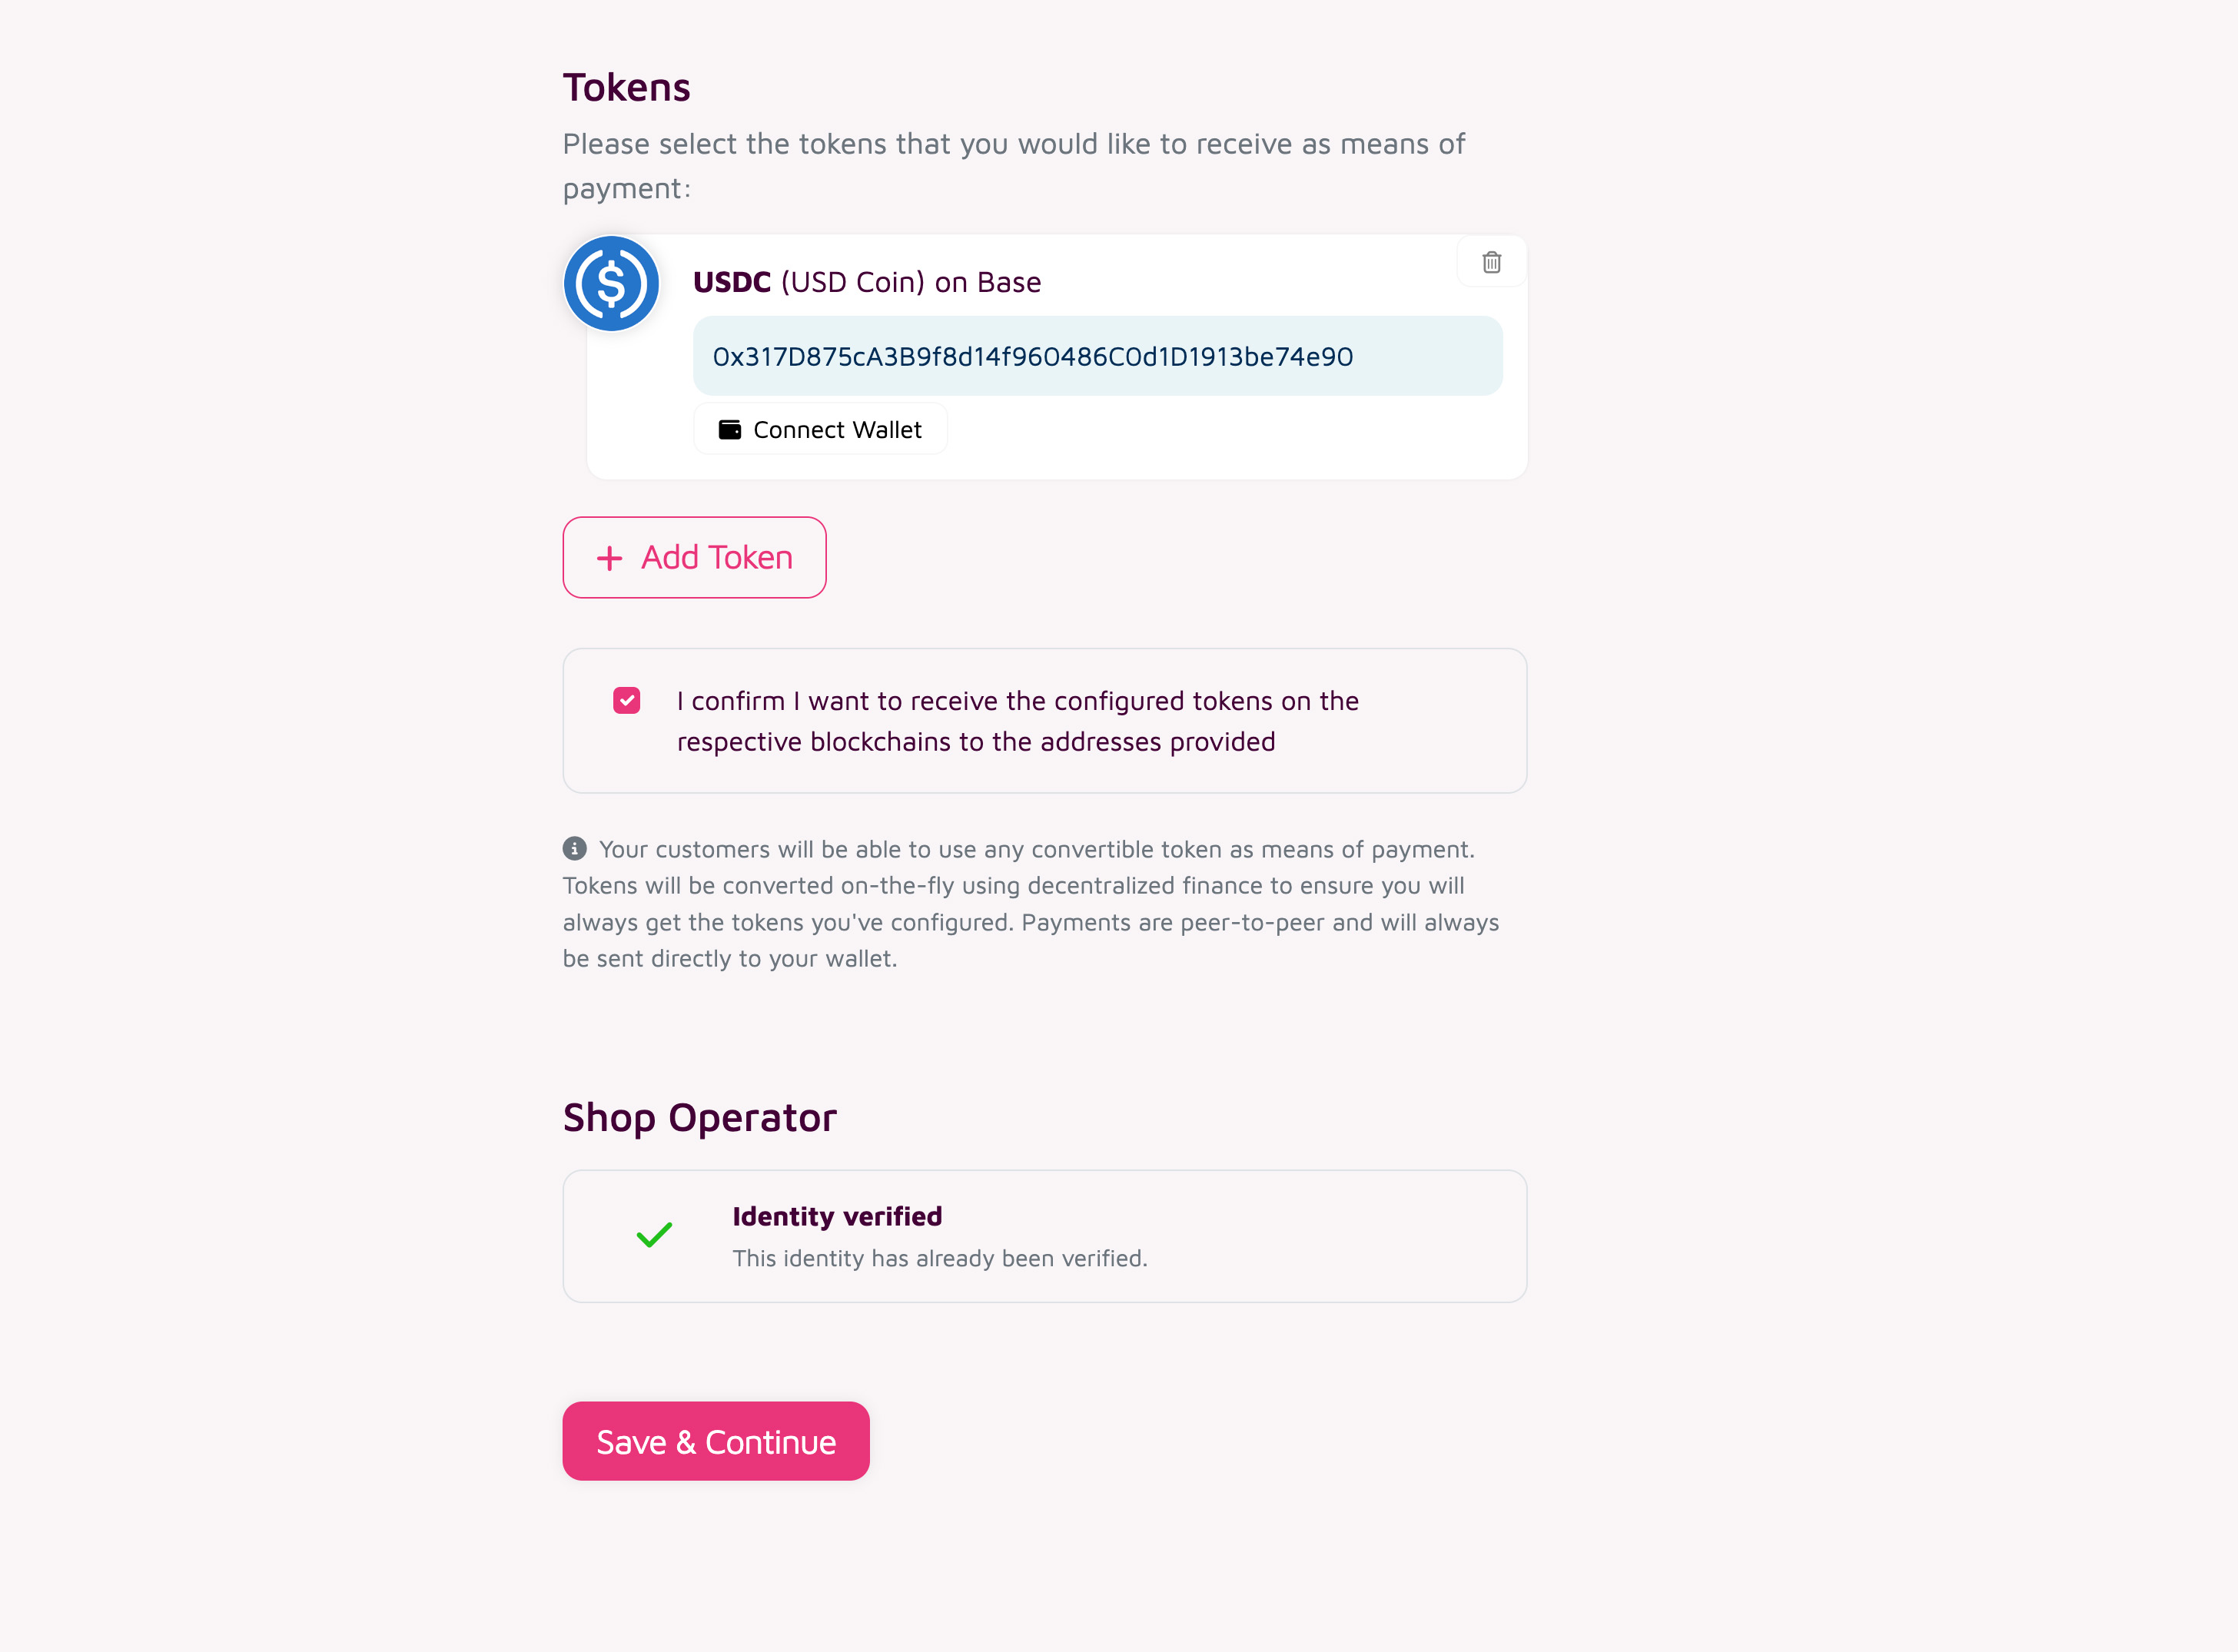
Set Receiver
Set the recipient for each token on each blockchain. You can use the same address for multiple tokens if desired:
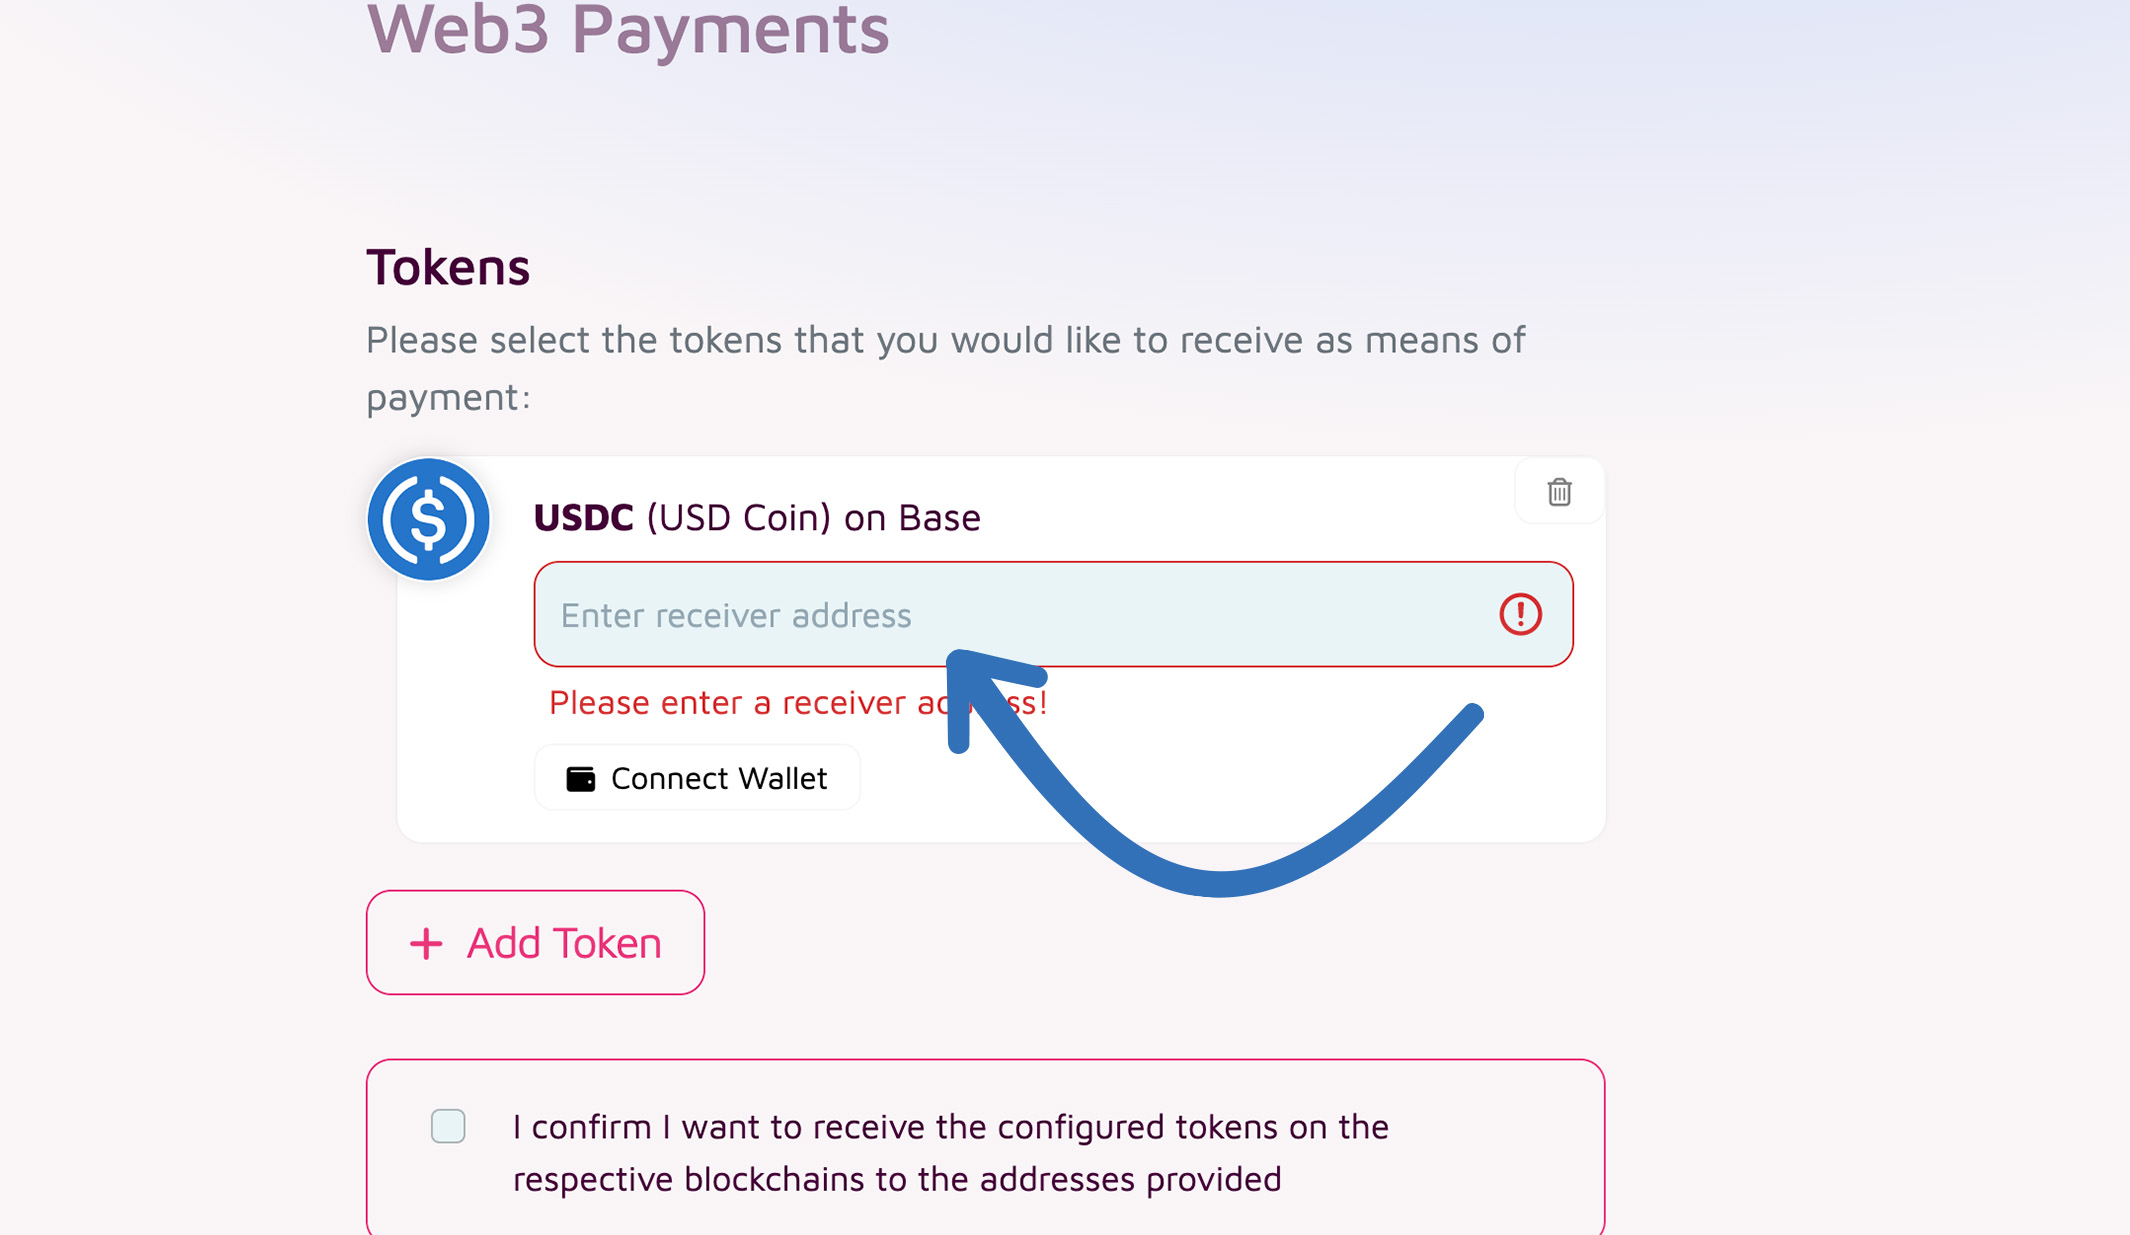
Please ensure that the entered wallet address can receive the selected token on the chosen blockchain.
Please make sure to explicitly confirm your configuration before proceeding:
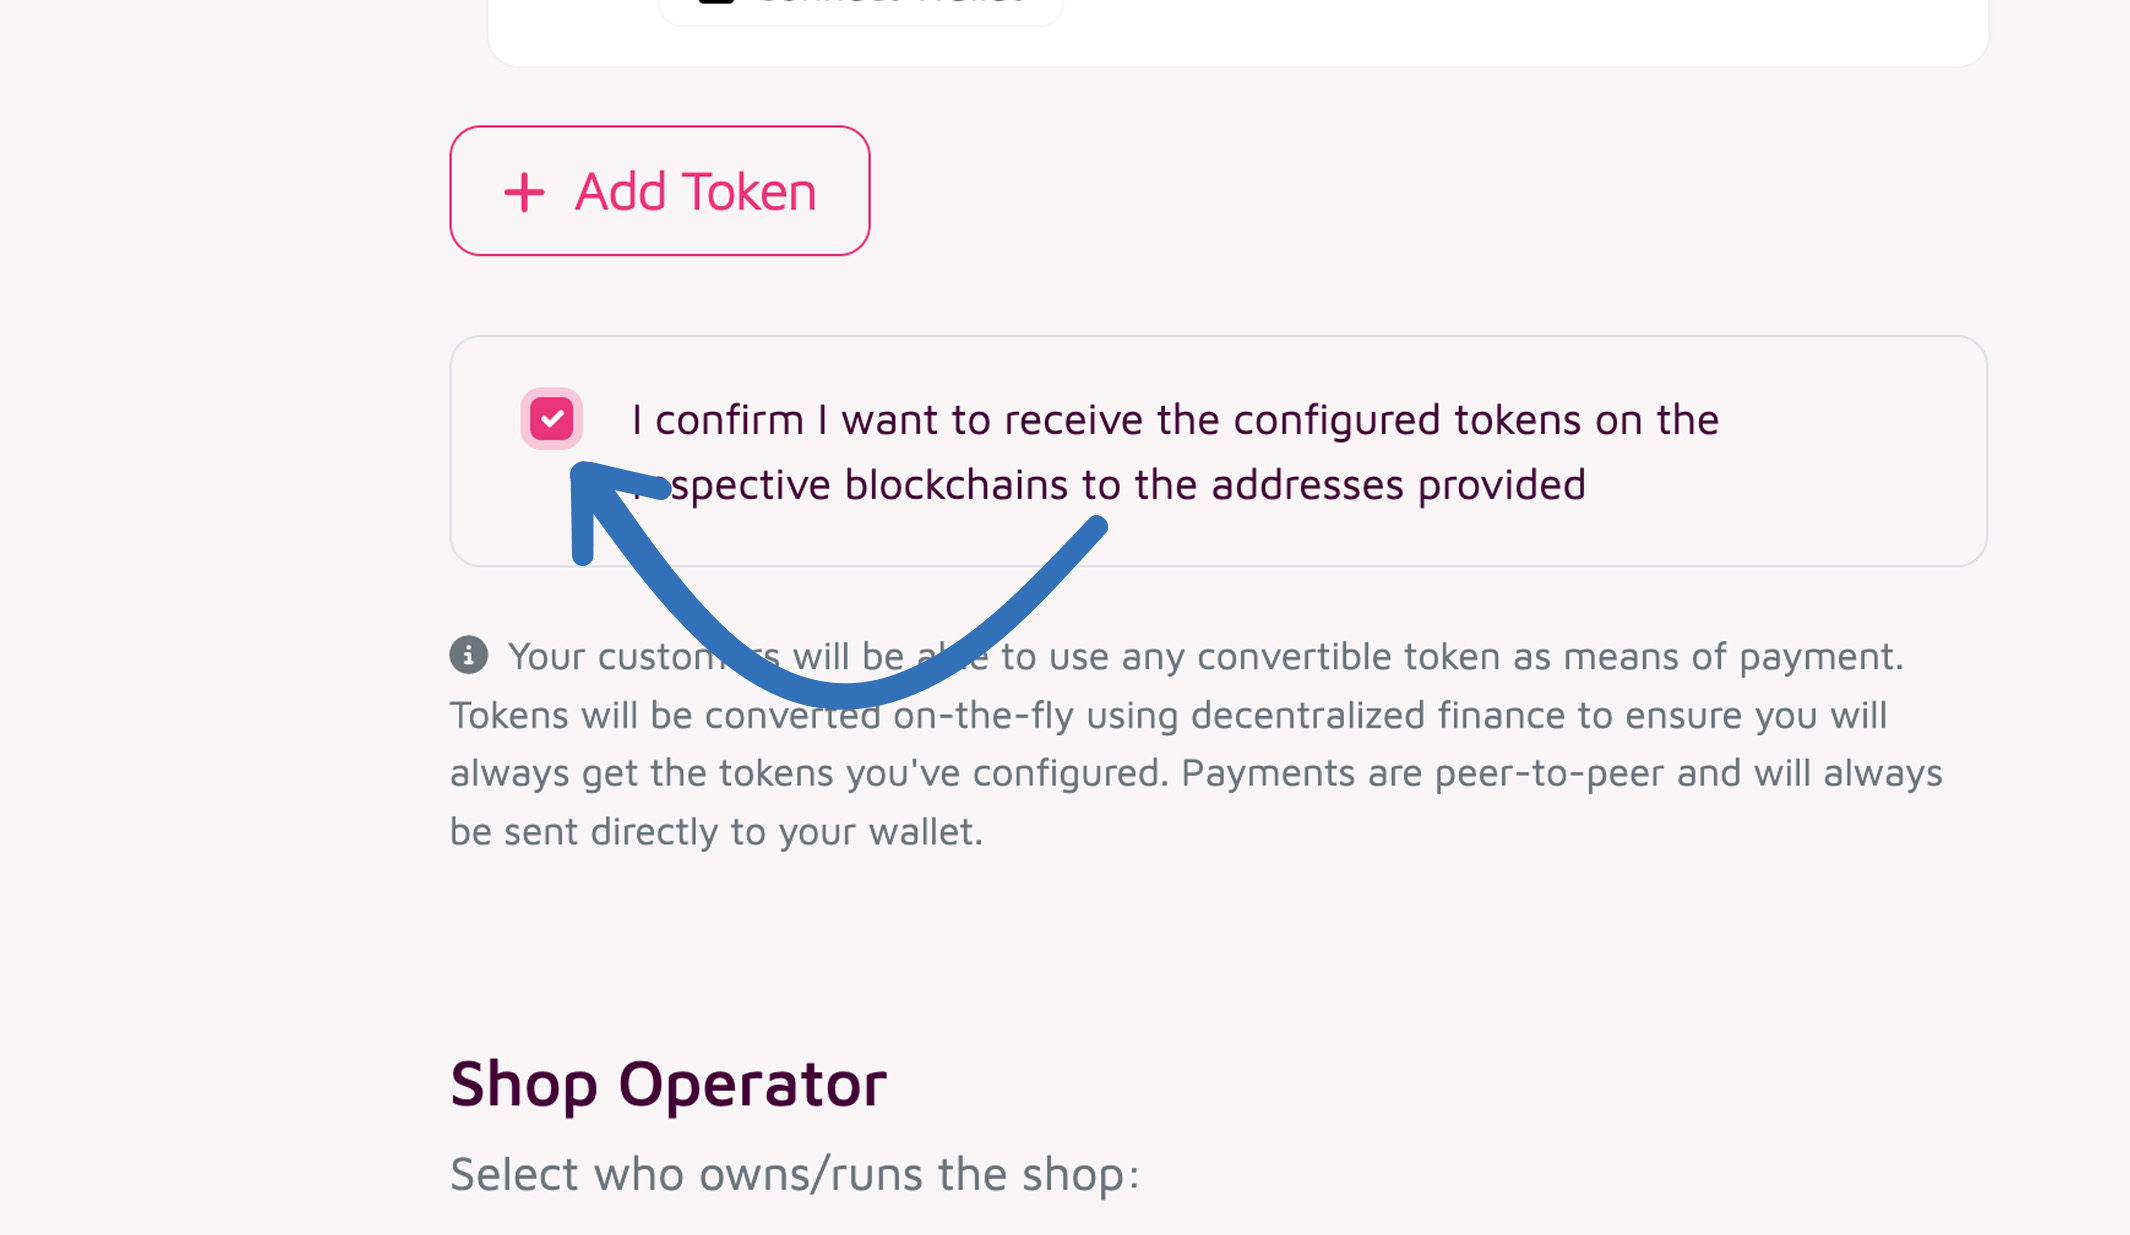
Provide Shop Operator Data
Now select who owns/runs the shop.
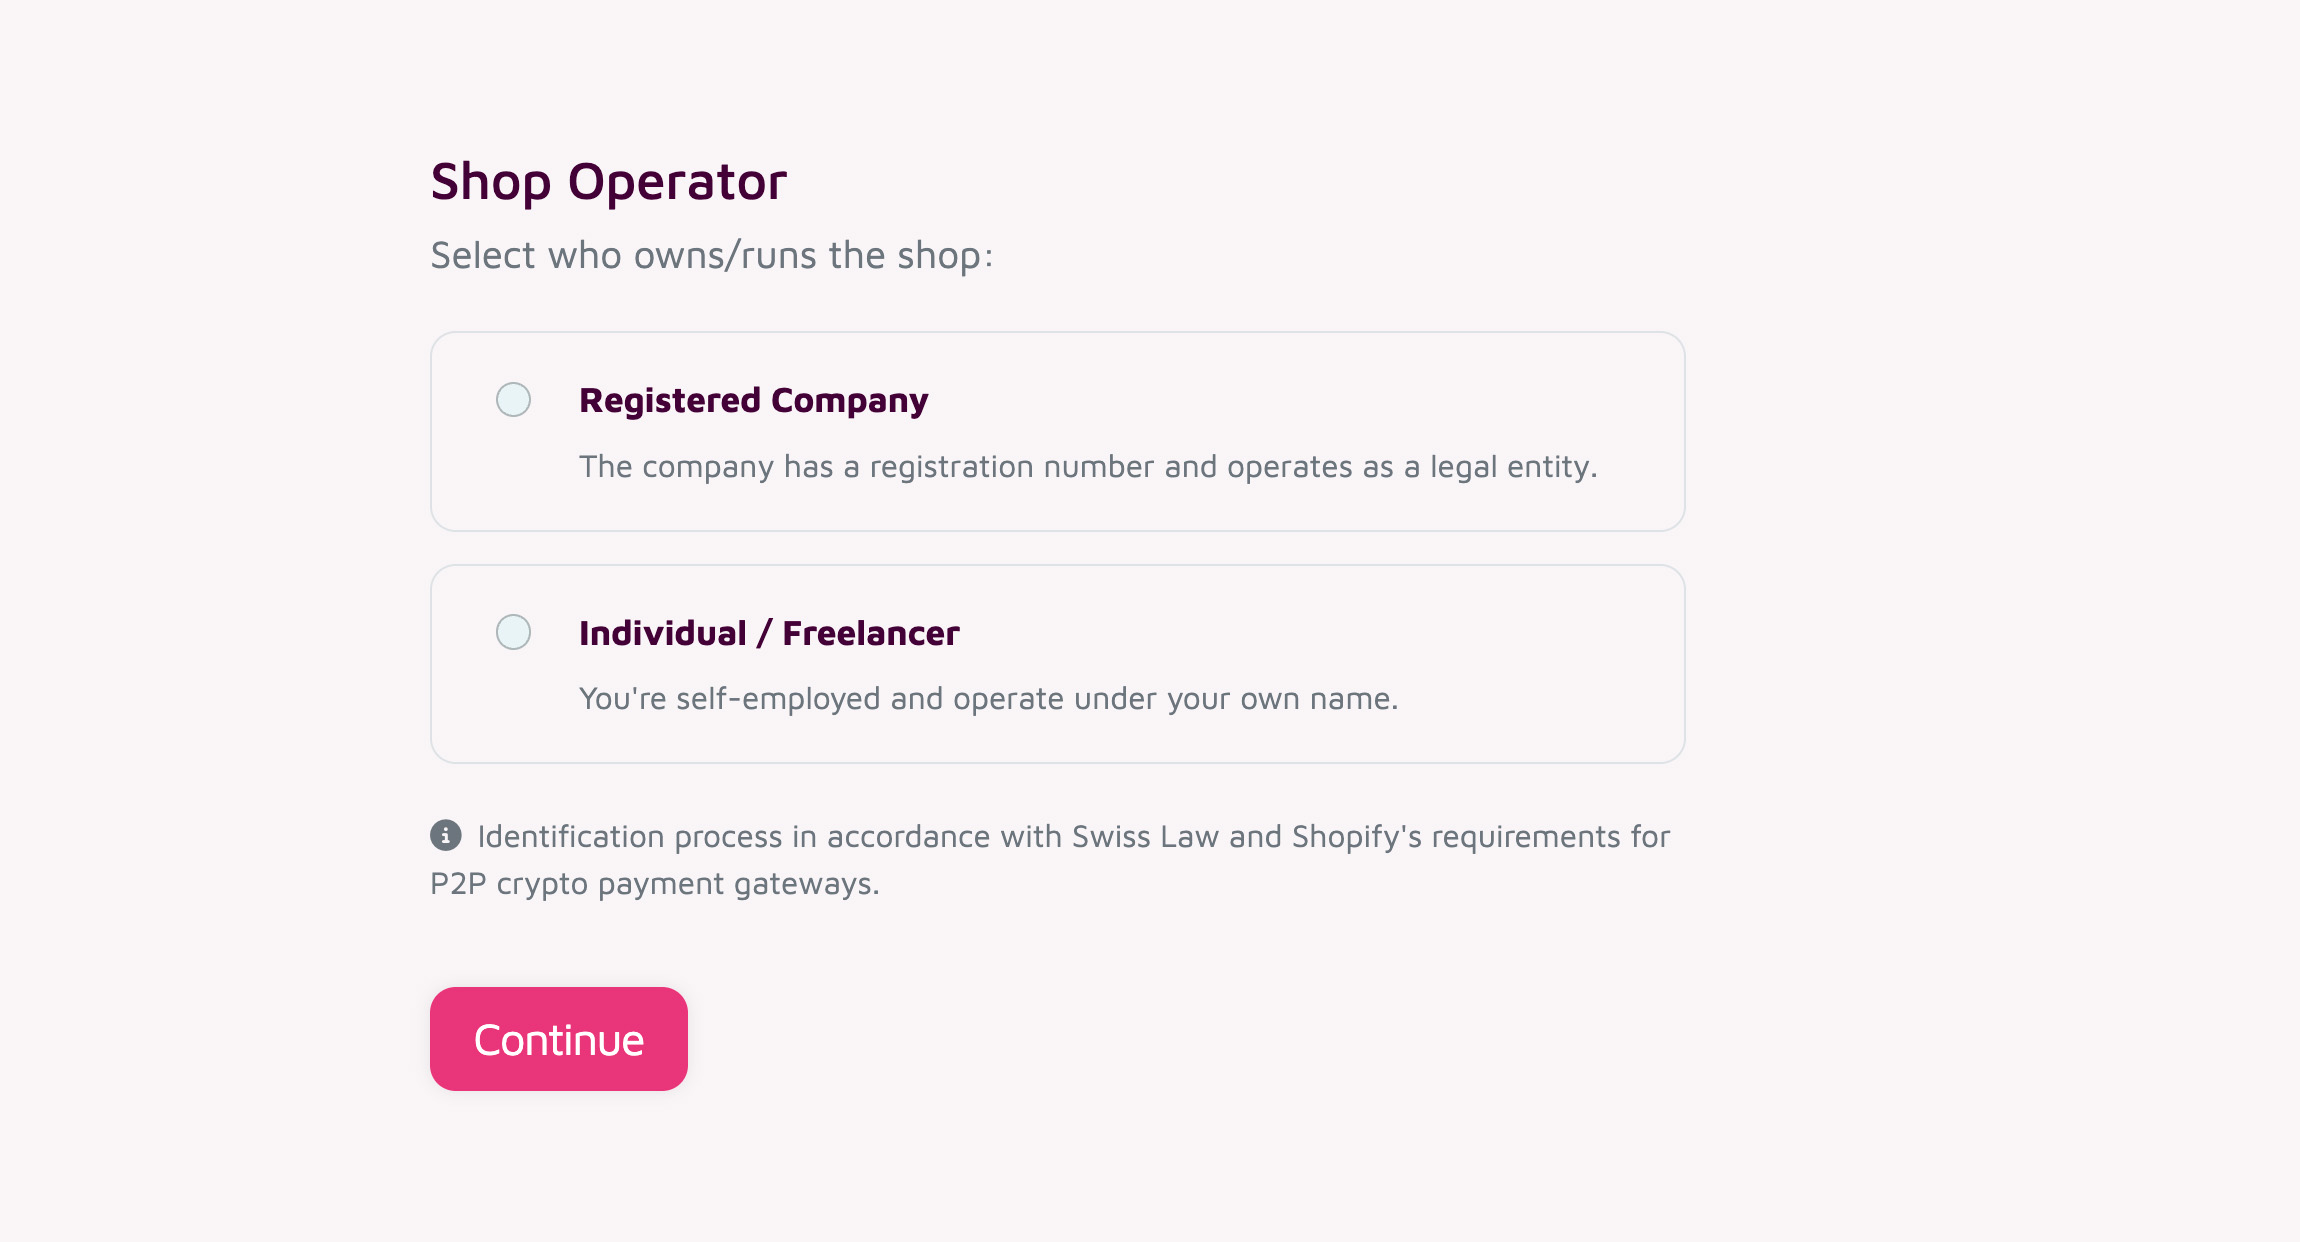
Select "Registered Company" if your company is a registered legal entity.
Otherwise select "Individual" if you own/run the shop personally.
Then click "Continue".
Then provide all required information:
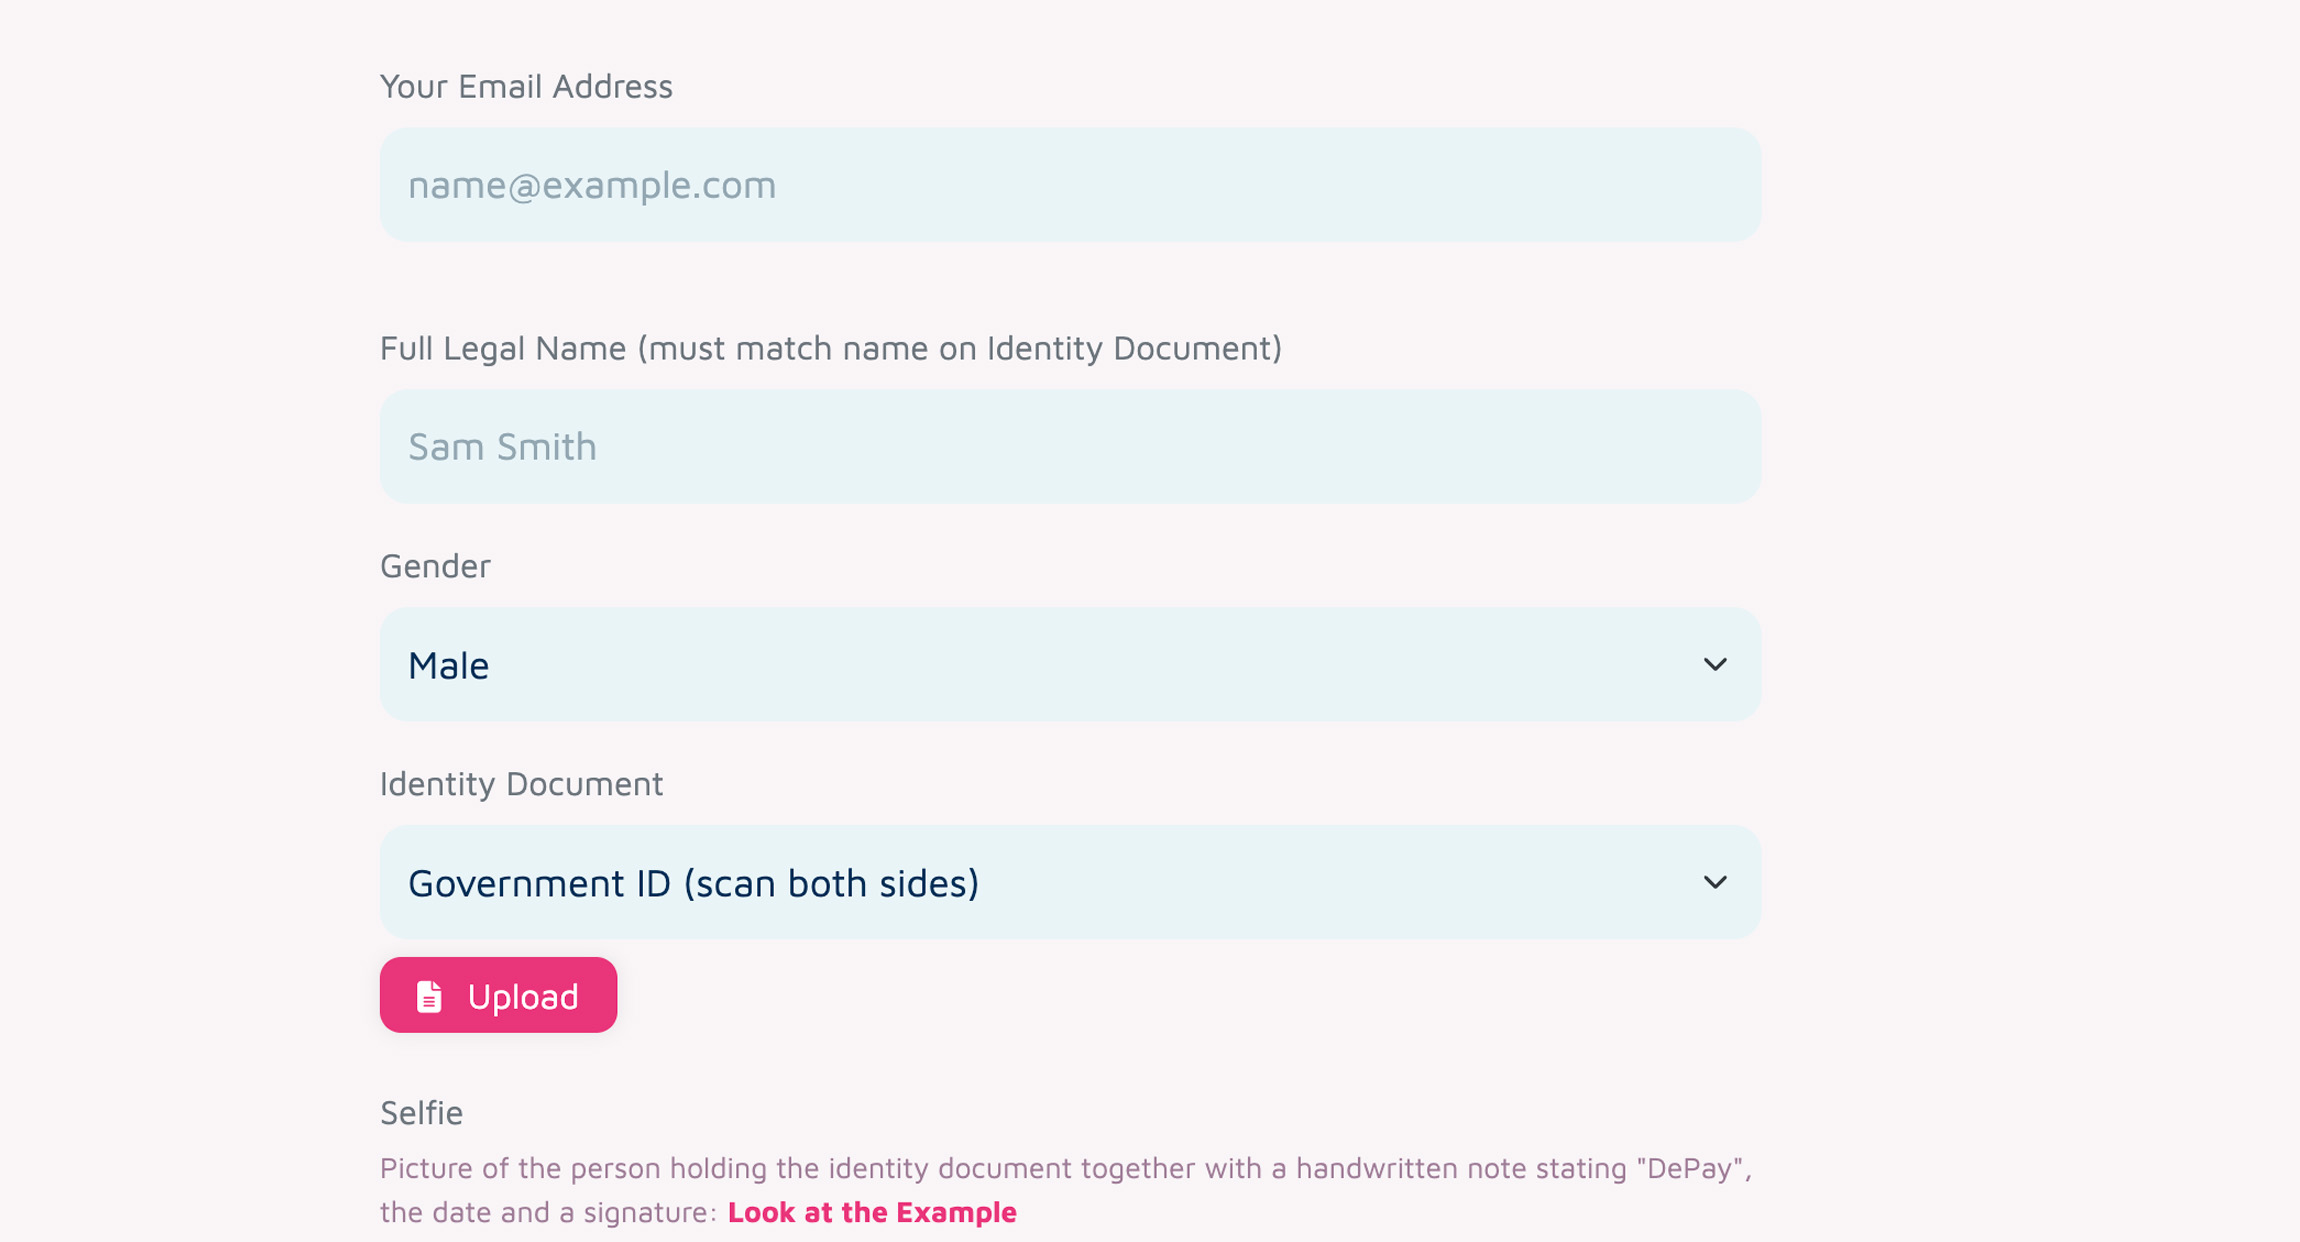
Make sure to click "Save & Continue" at the end.
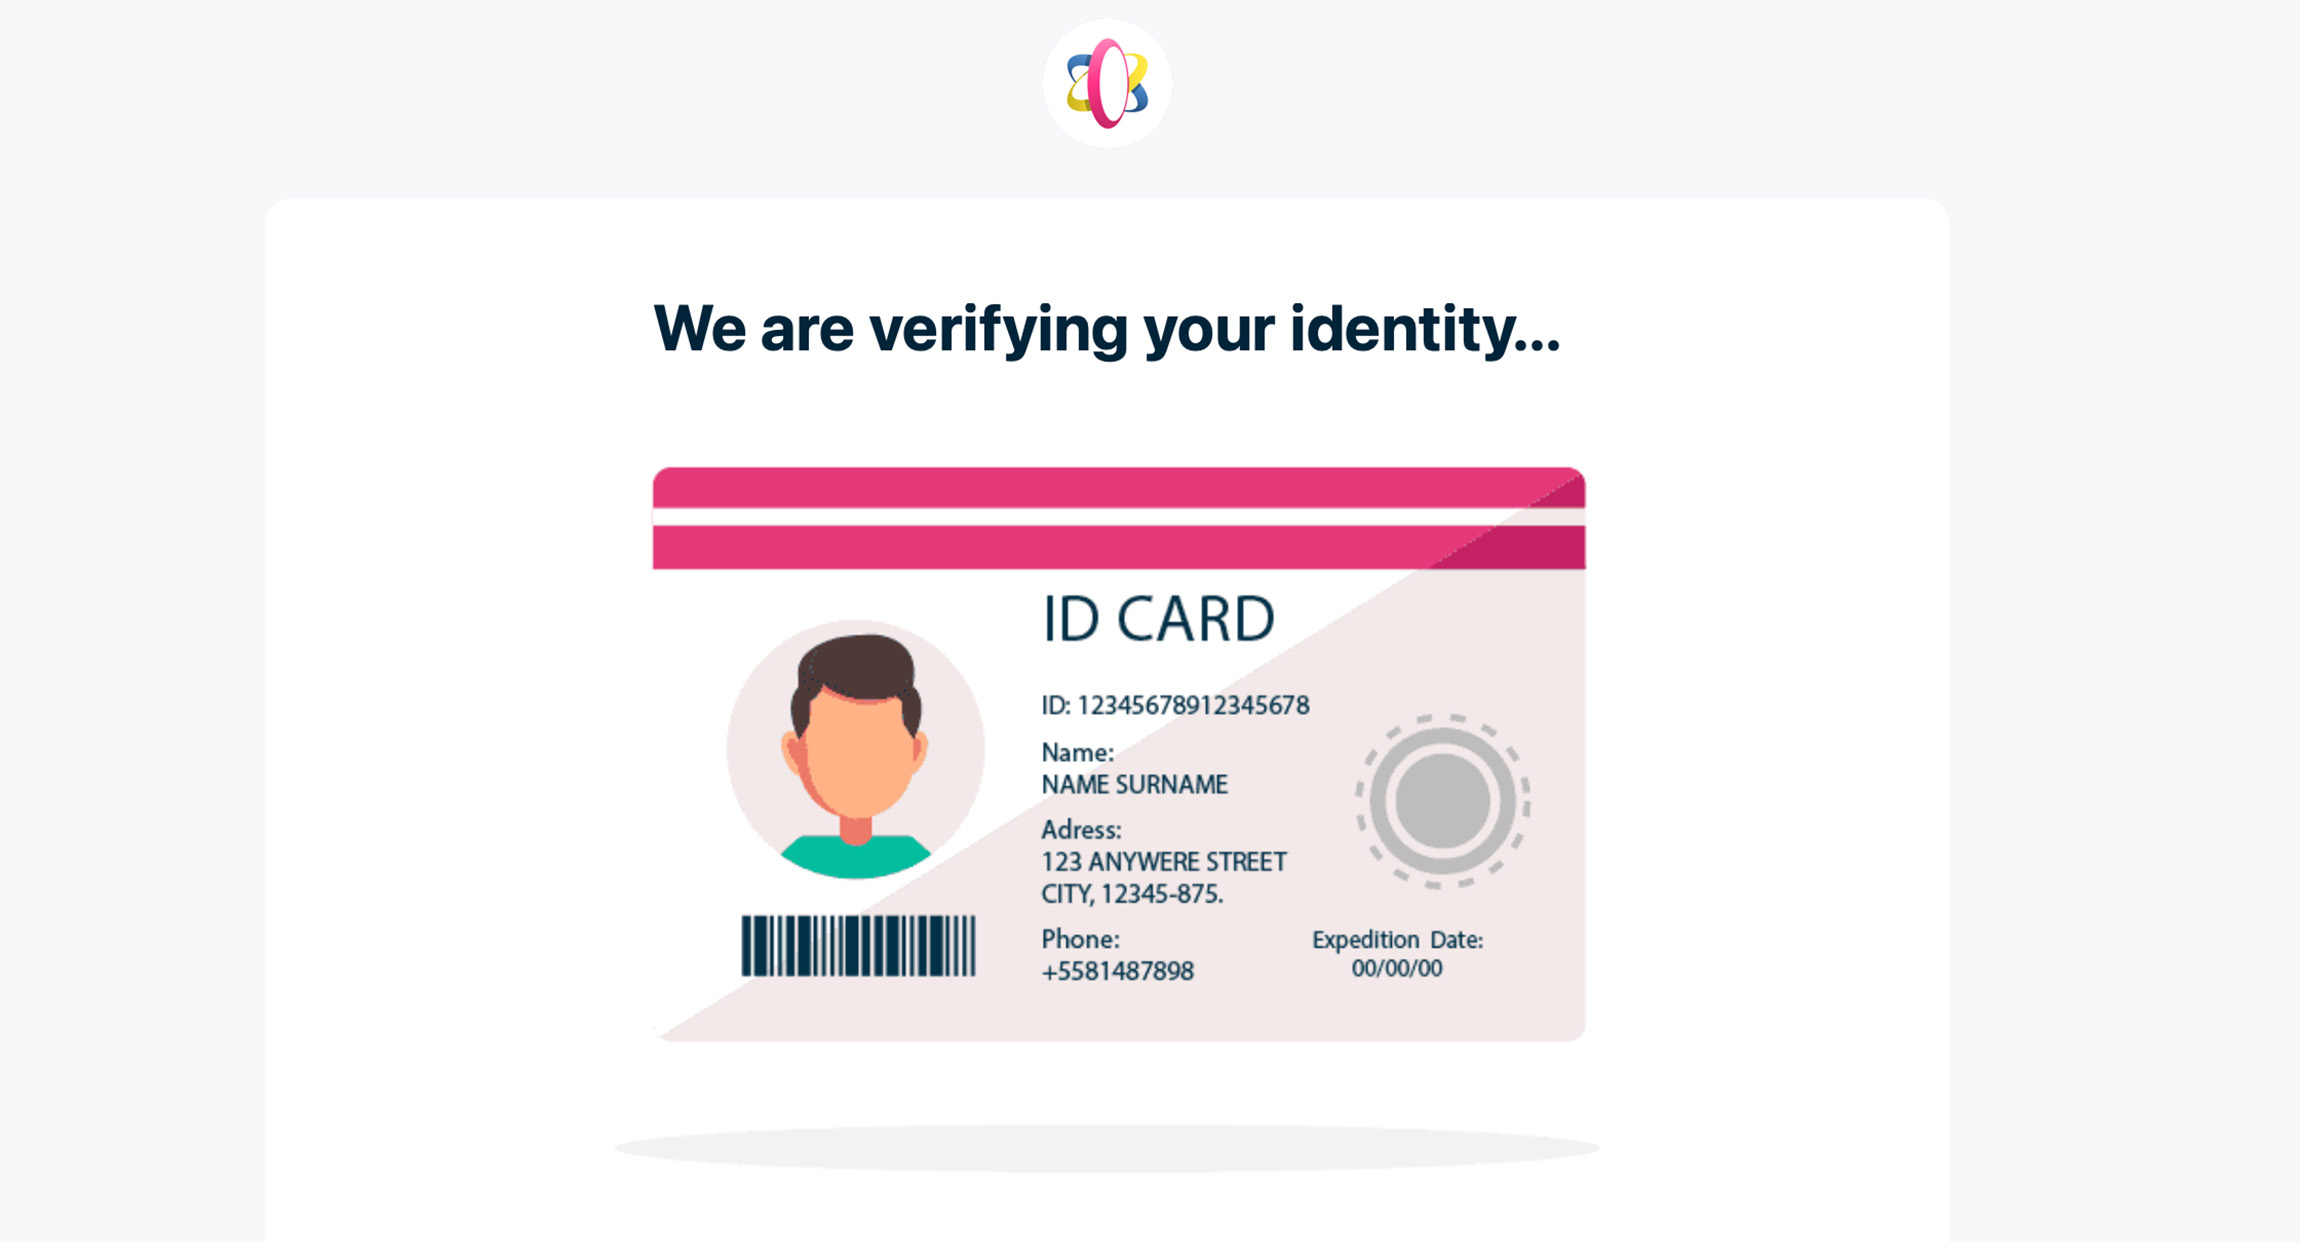
Wait for Verification
Now wait until your data has been verified.
Please be patient, this can take some time and we will send you an email as soon as the verification succeeded.
Approval E-Mail
Once we have verified your information you will receive an approval e-mail immediately.
Activate DePay App
Now within your approval e-mail you will find a "Start Now" link to activate DePay on Shopify.
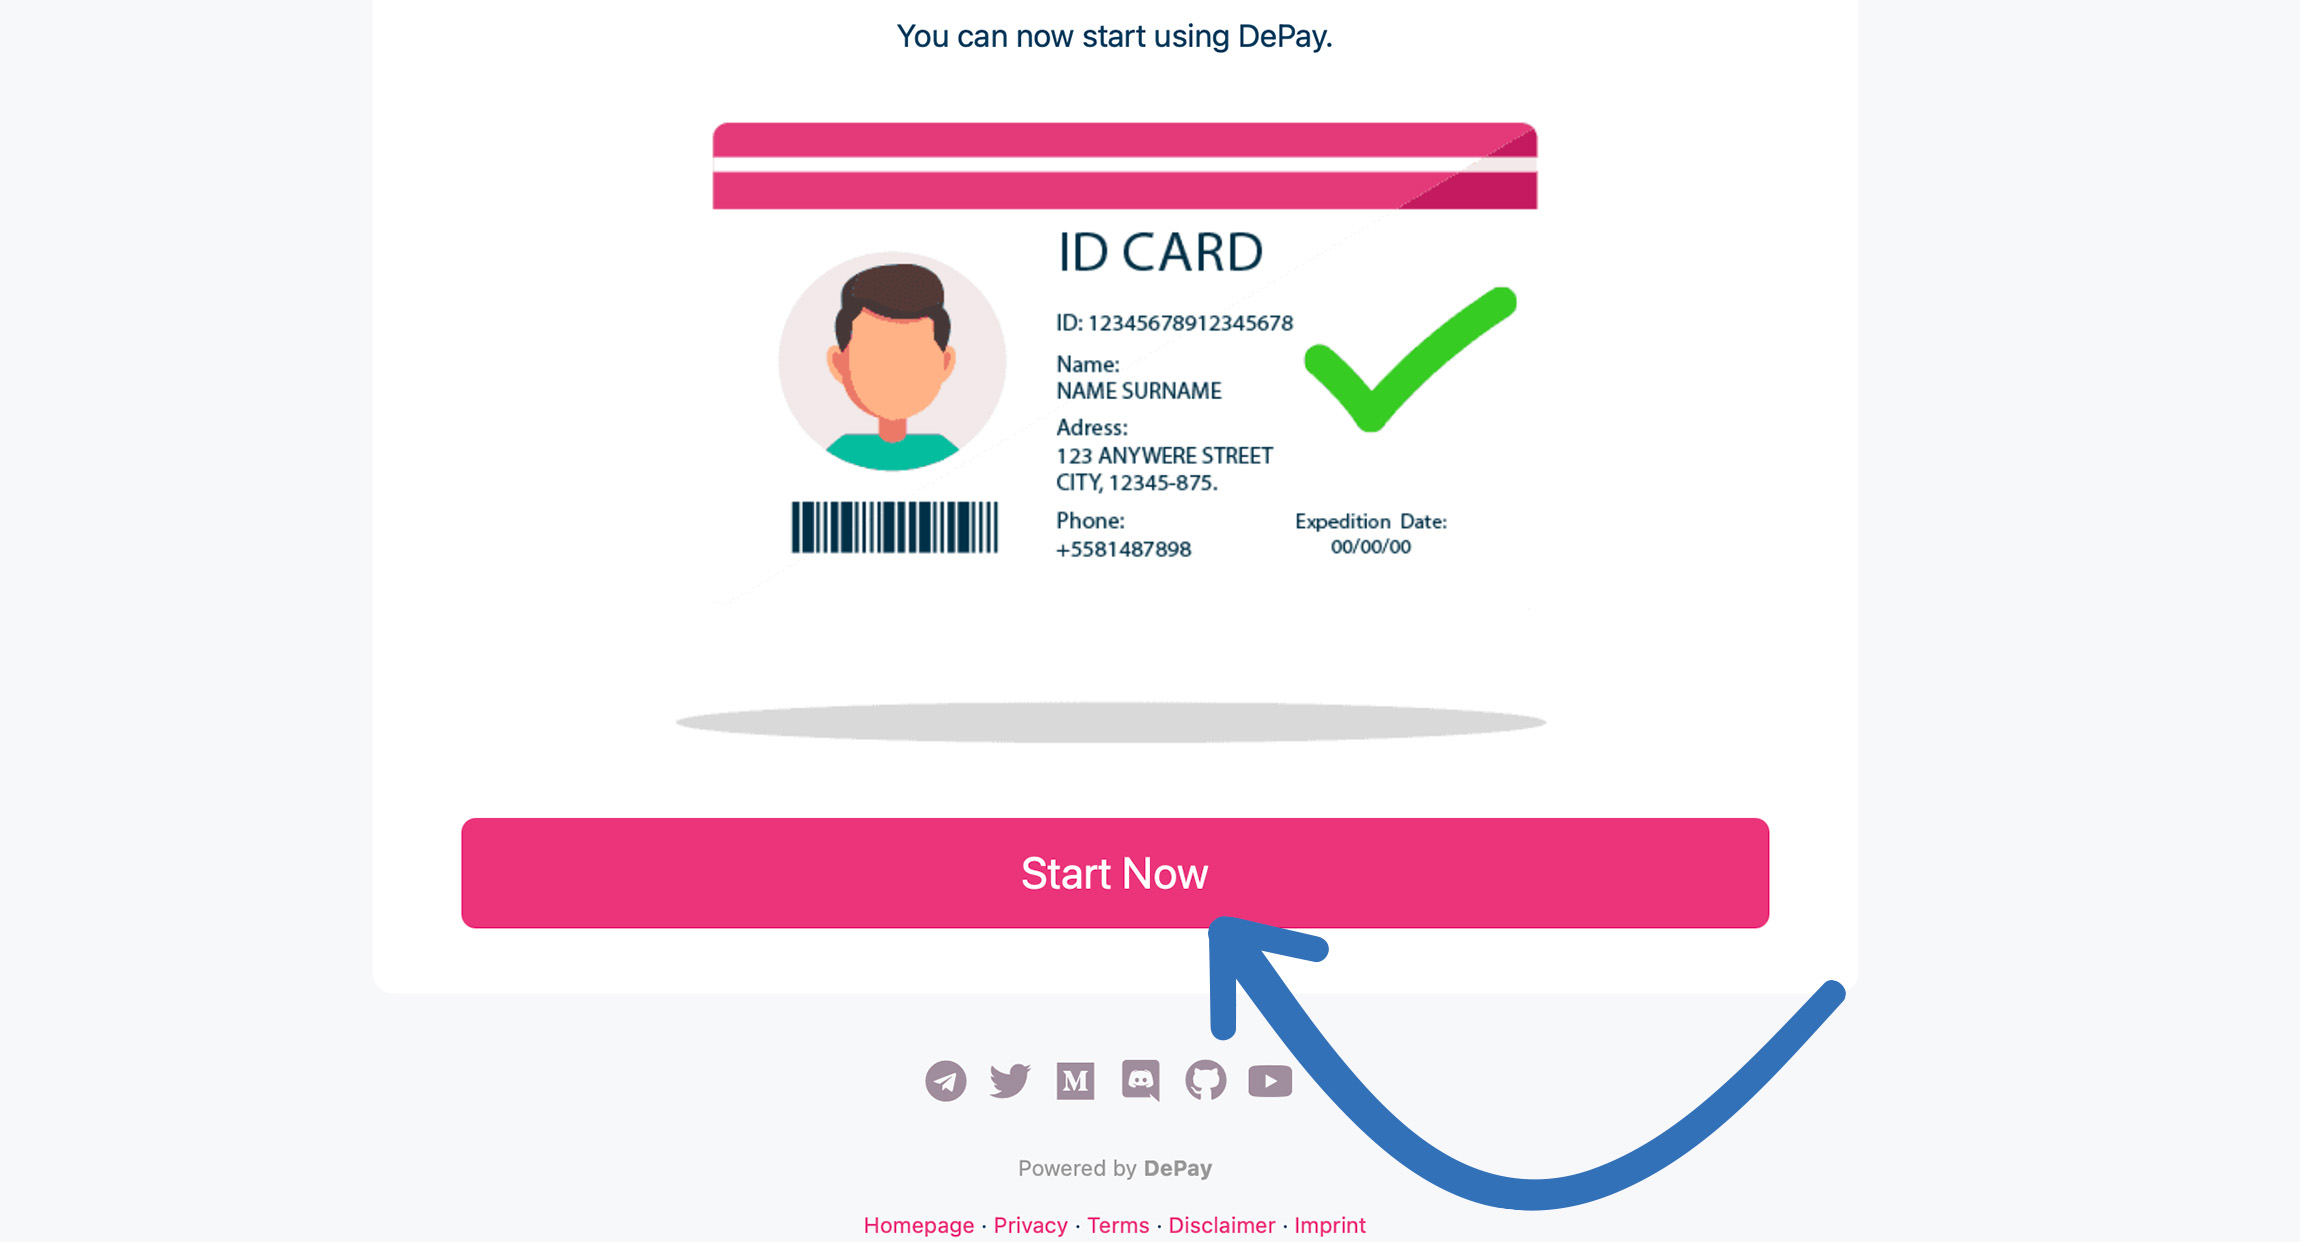
Click and follow "Start Now" which will bring you back to Shopify:
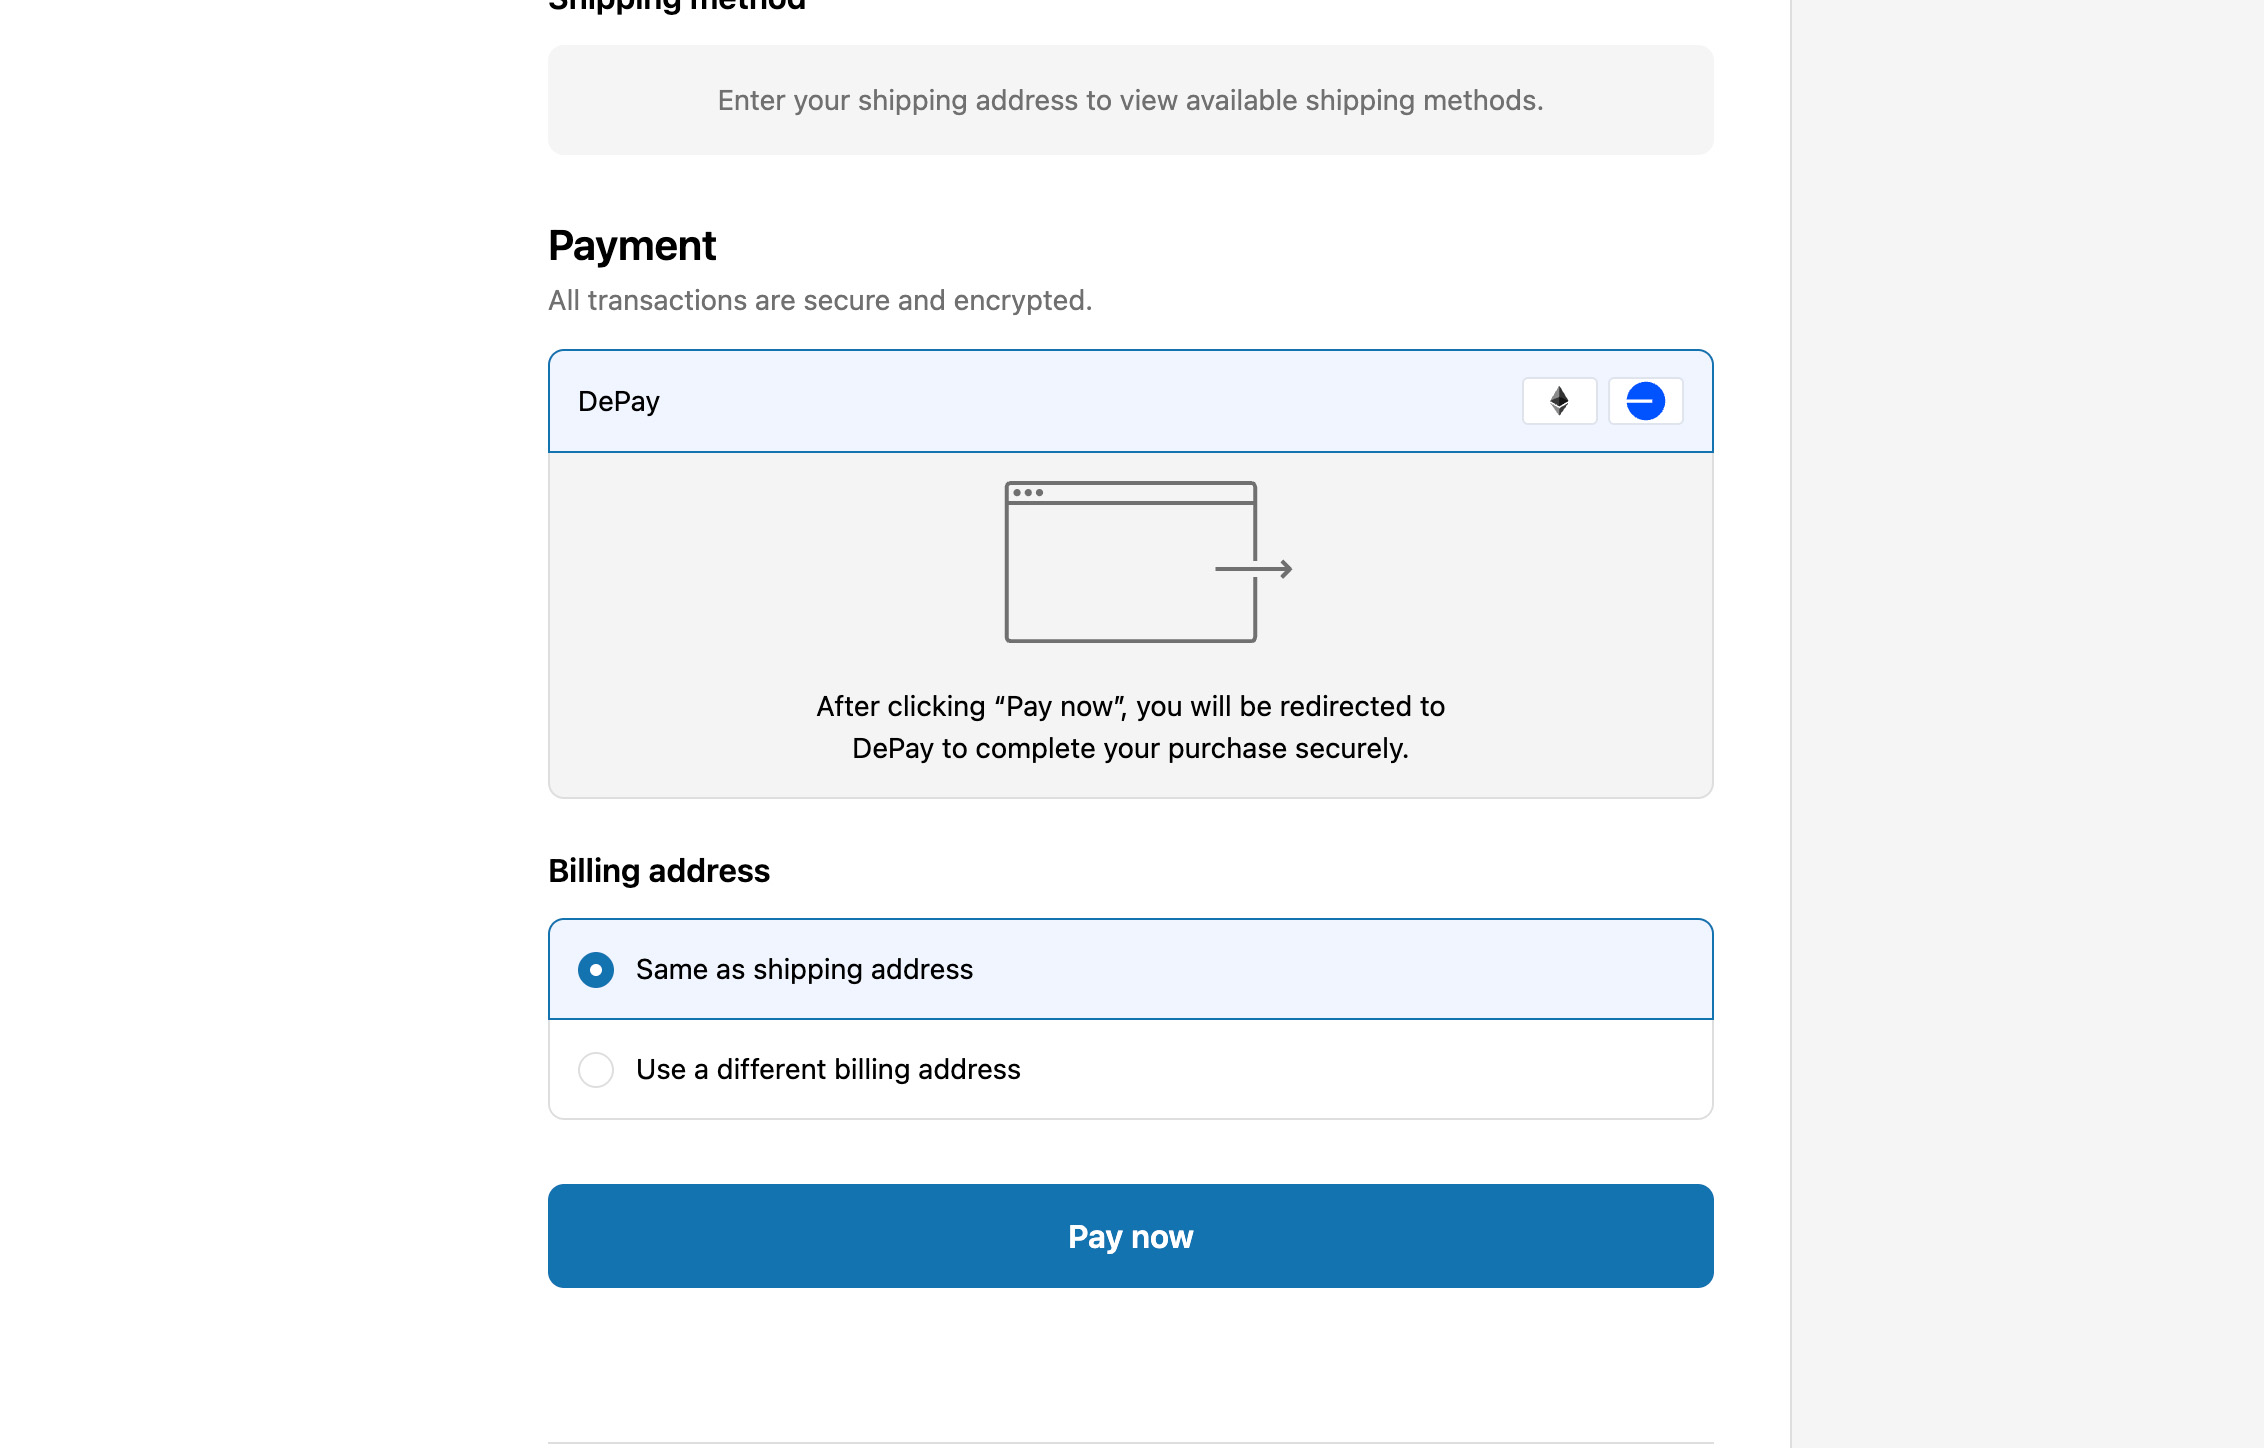
Before you can finish the setup, select the payment options that you would like to display during checkout:
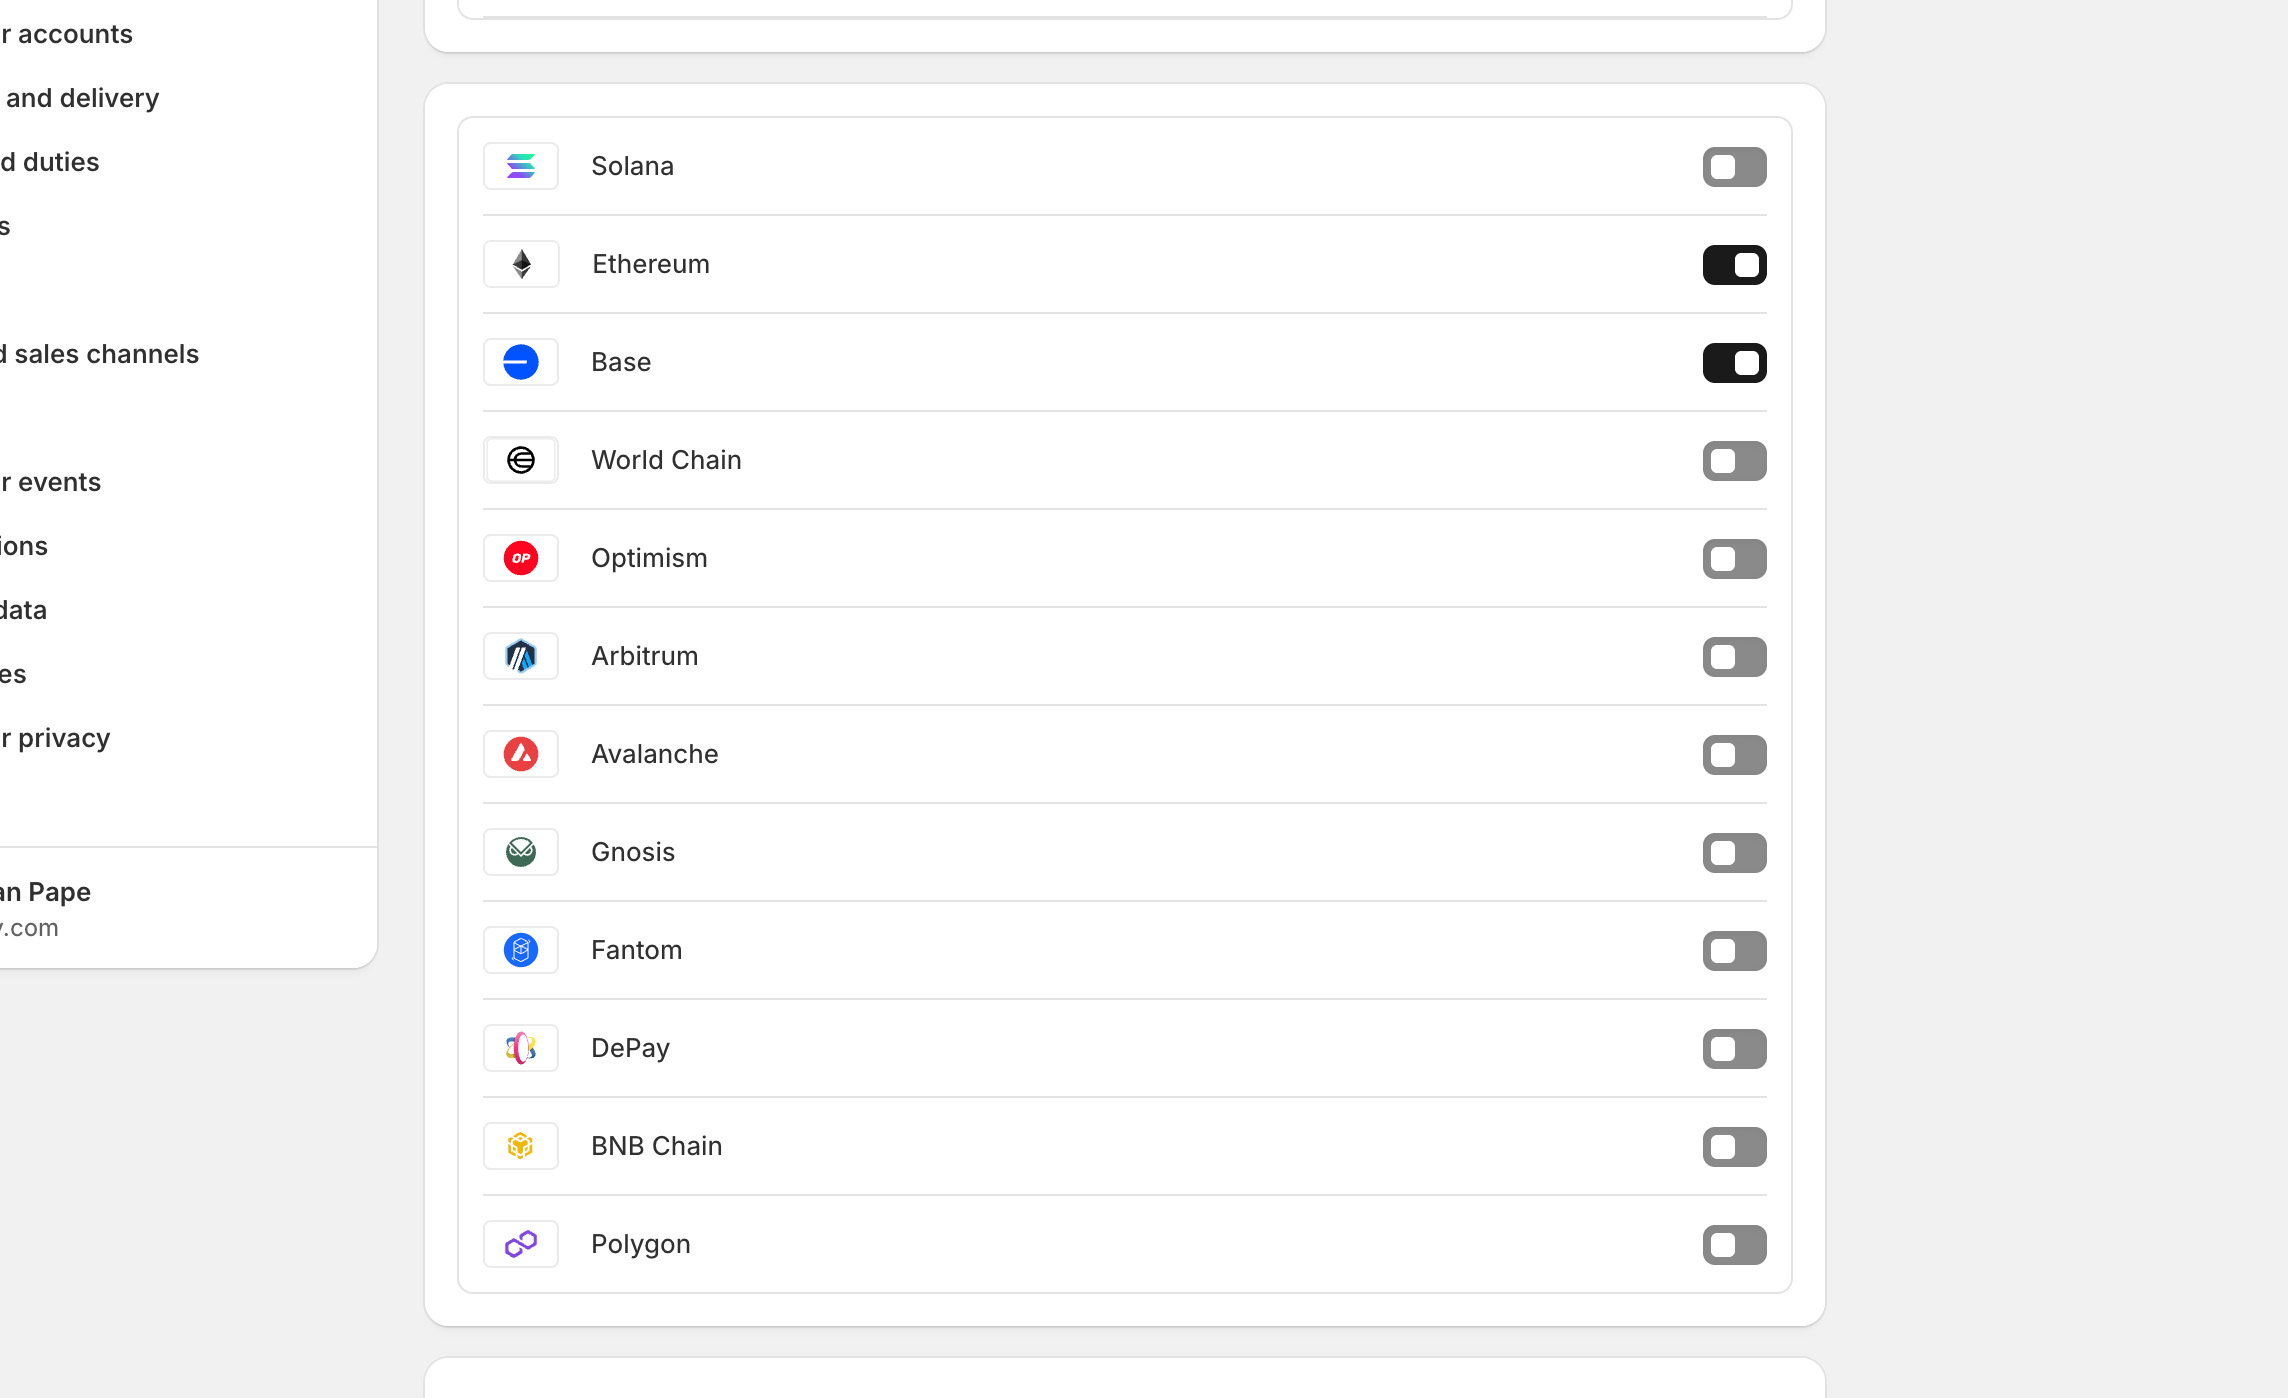
The payment options you select here are for display purposes only.
They appear during checkout to help customers choose a payment method but do not affect your actual payment configuration in any way.
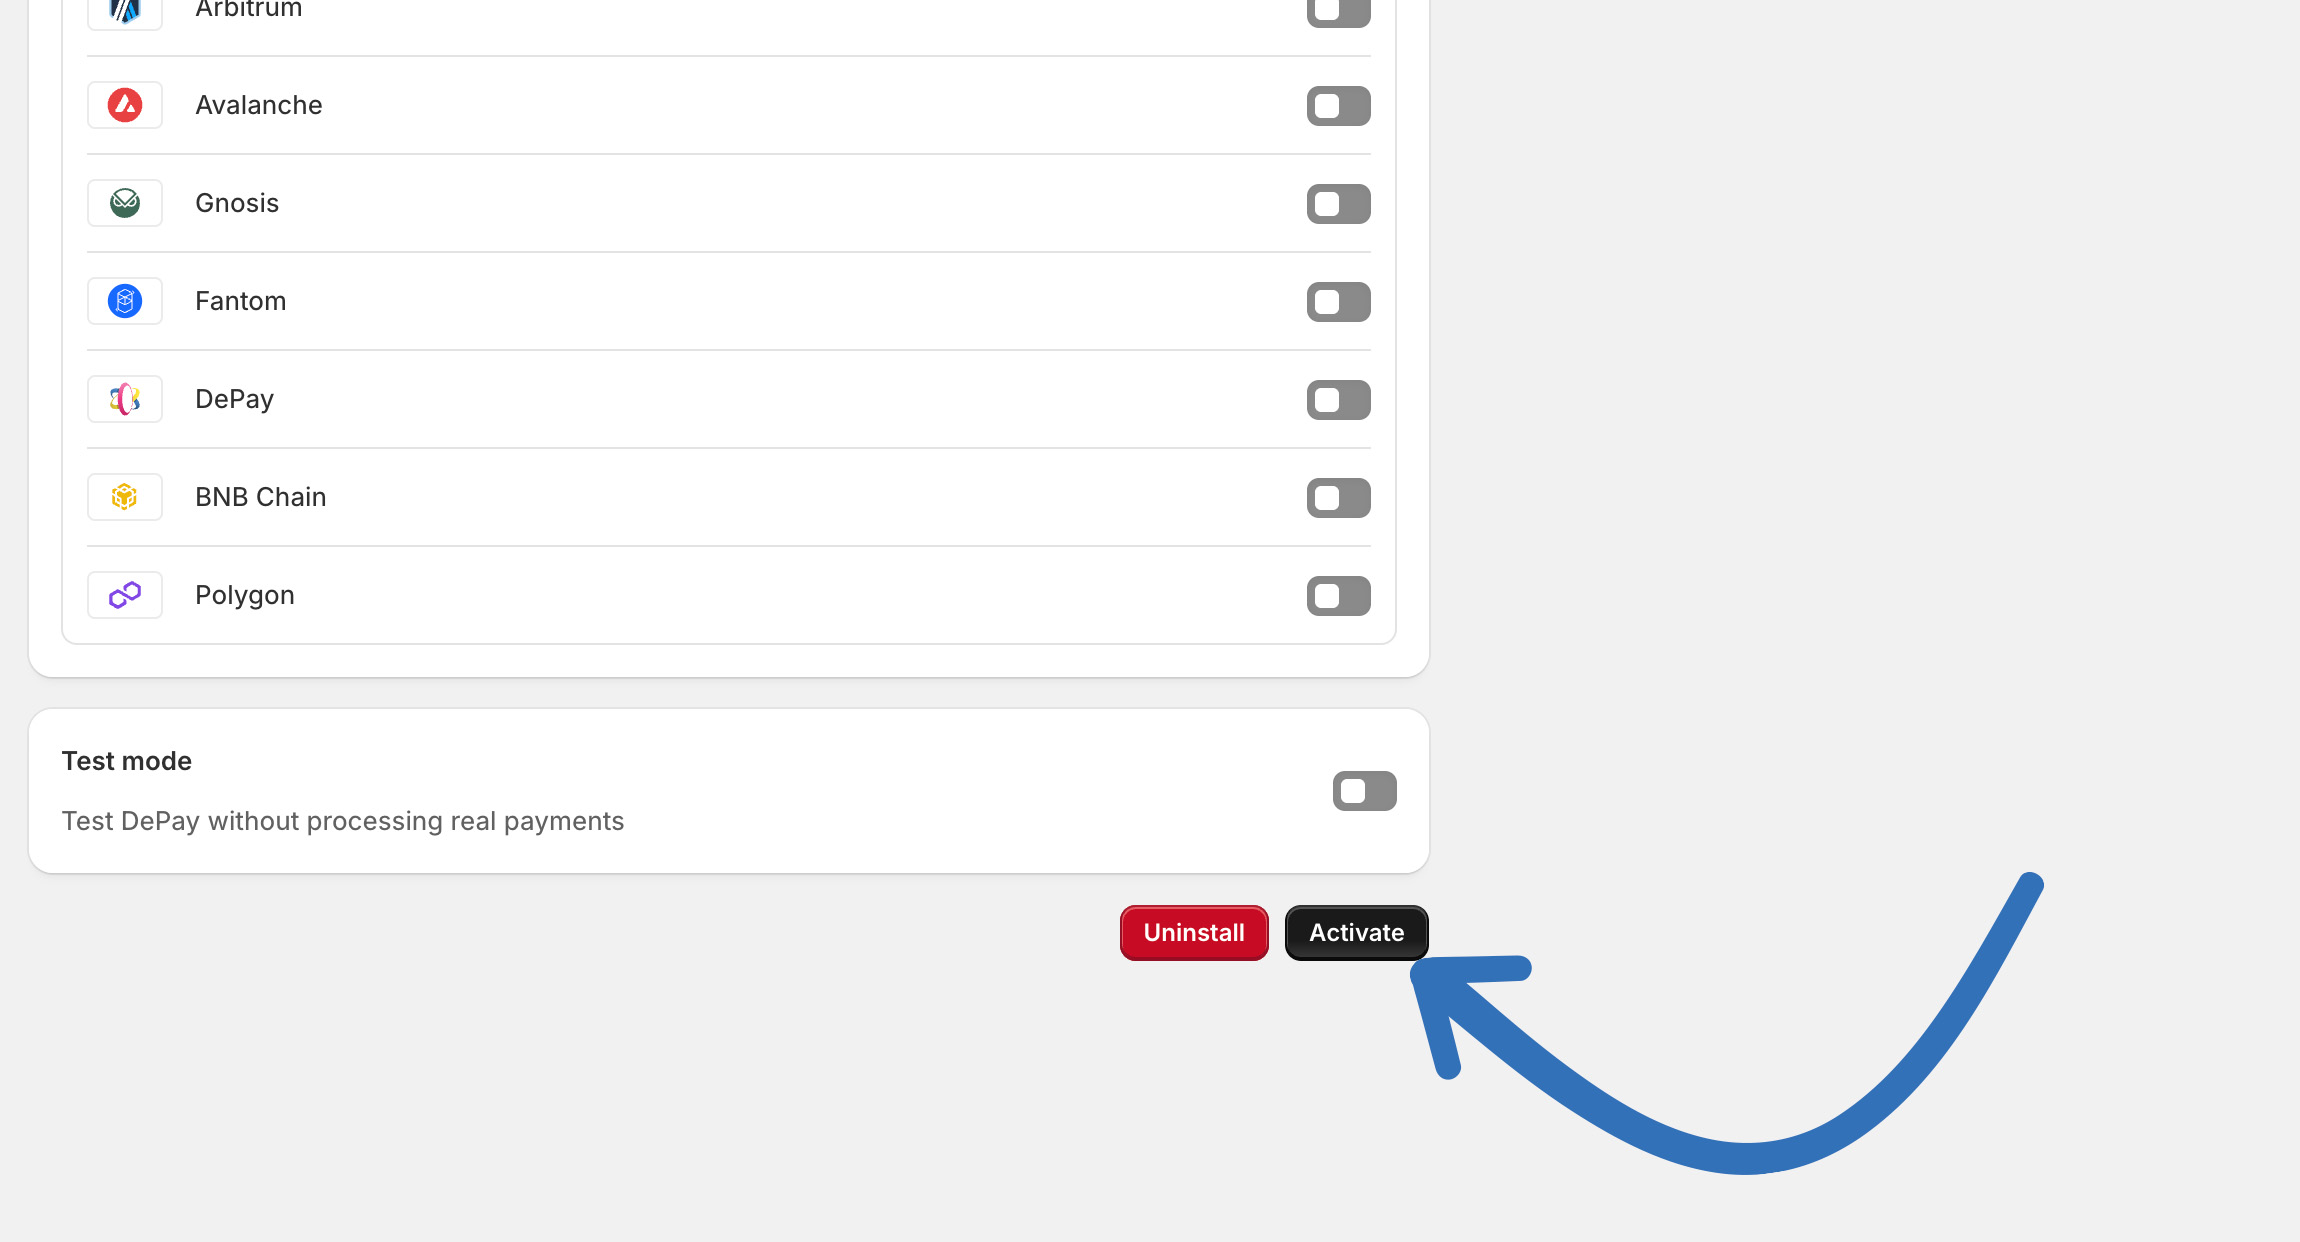
To complete the installation, please be sure to click “Activate”:
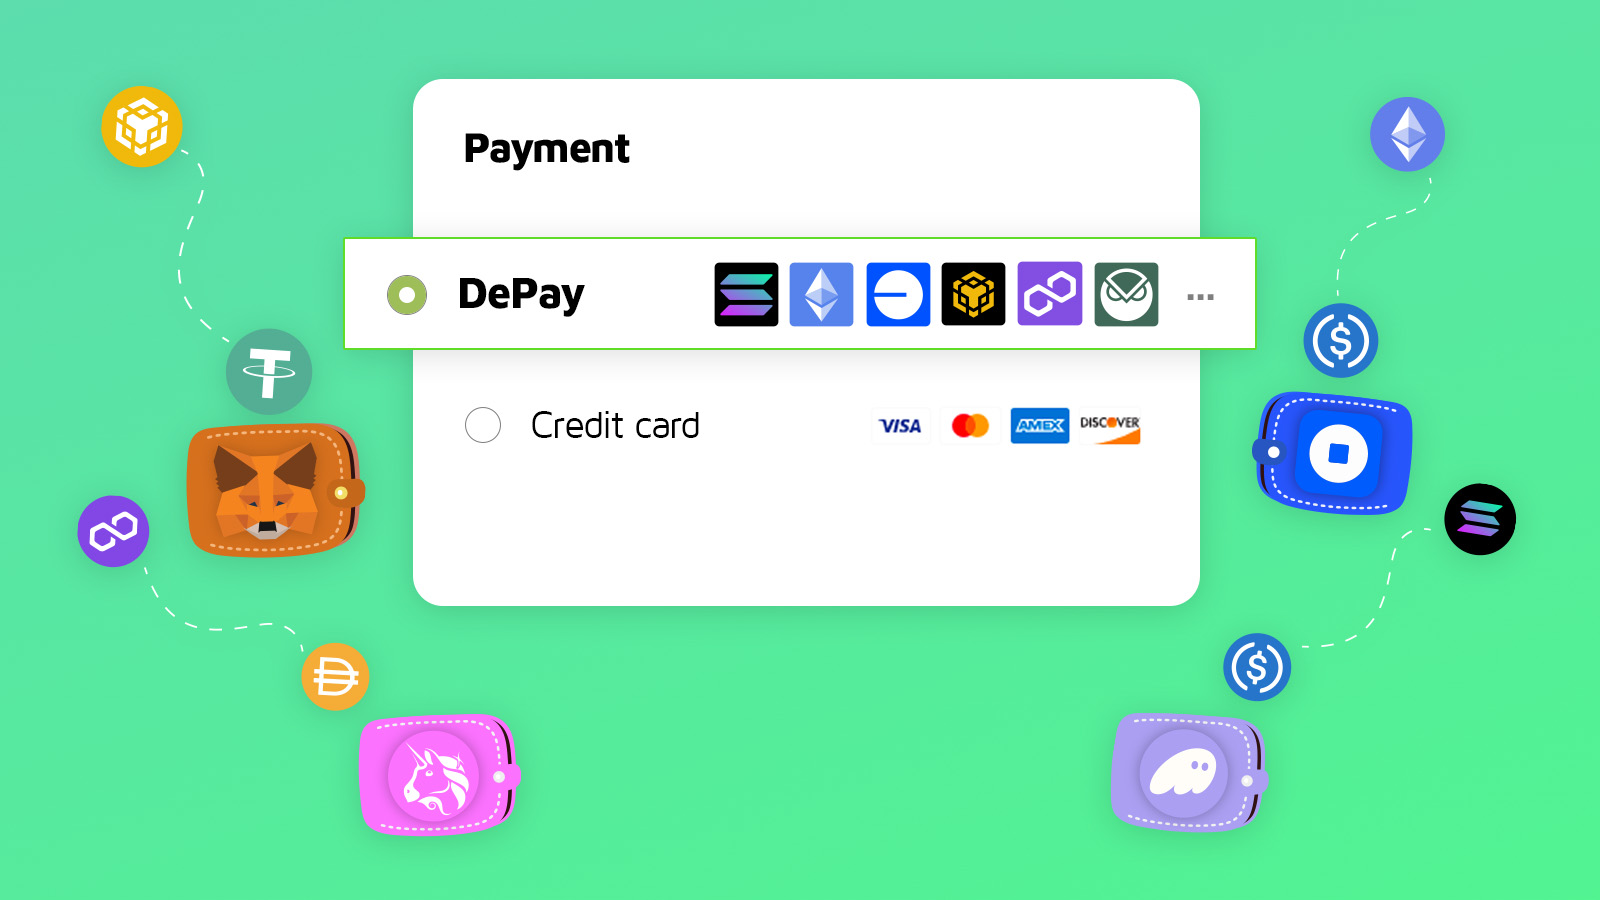
You’ve successfully installed the DePay Payment Gateway for Shopify.
Your customers can now choose 'DePay' as a payment option during checkout.
Change your Configuration
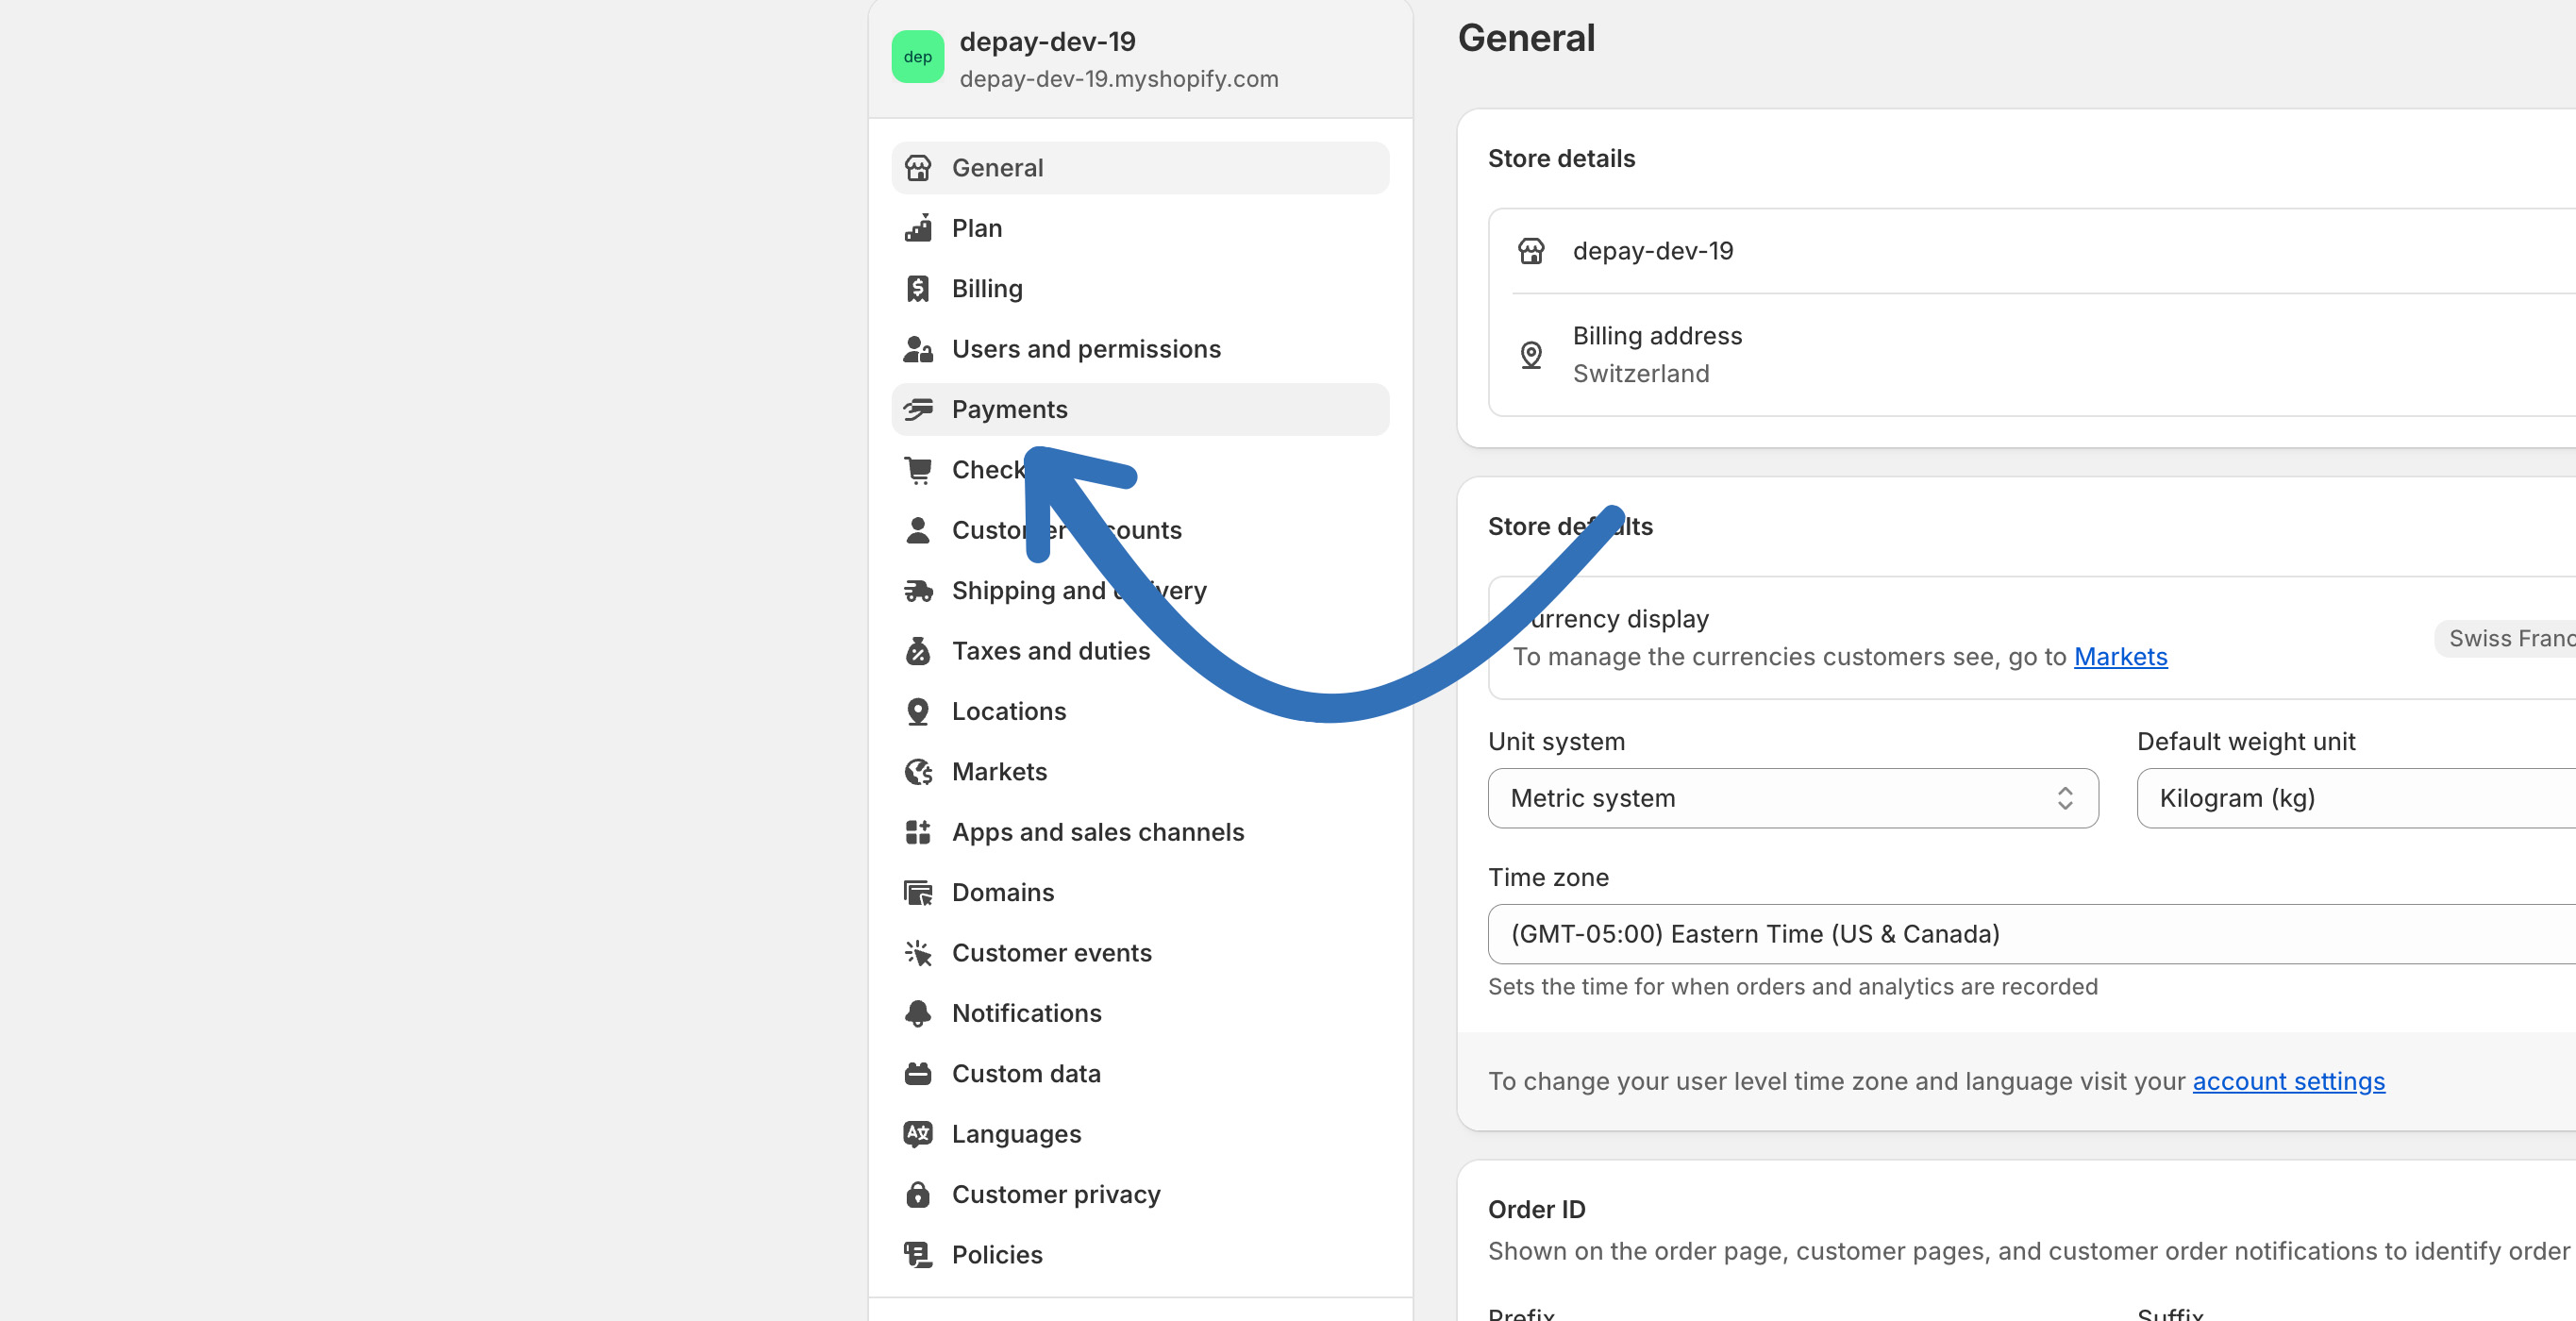
To change your store’s payment configuration—such as the tokens you want to accept or the receiving addresses—go to your Shopify admin: https://admin.shopify.com
Then select "Settings" in bottom left:
Then select "Payments" in the side navigation:
Then select "DePay":
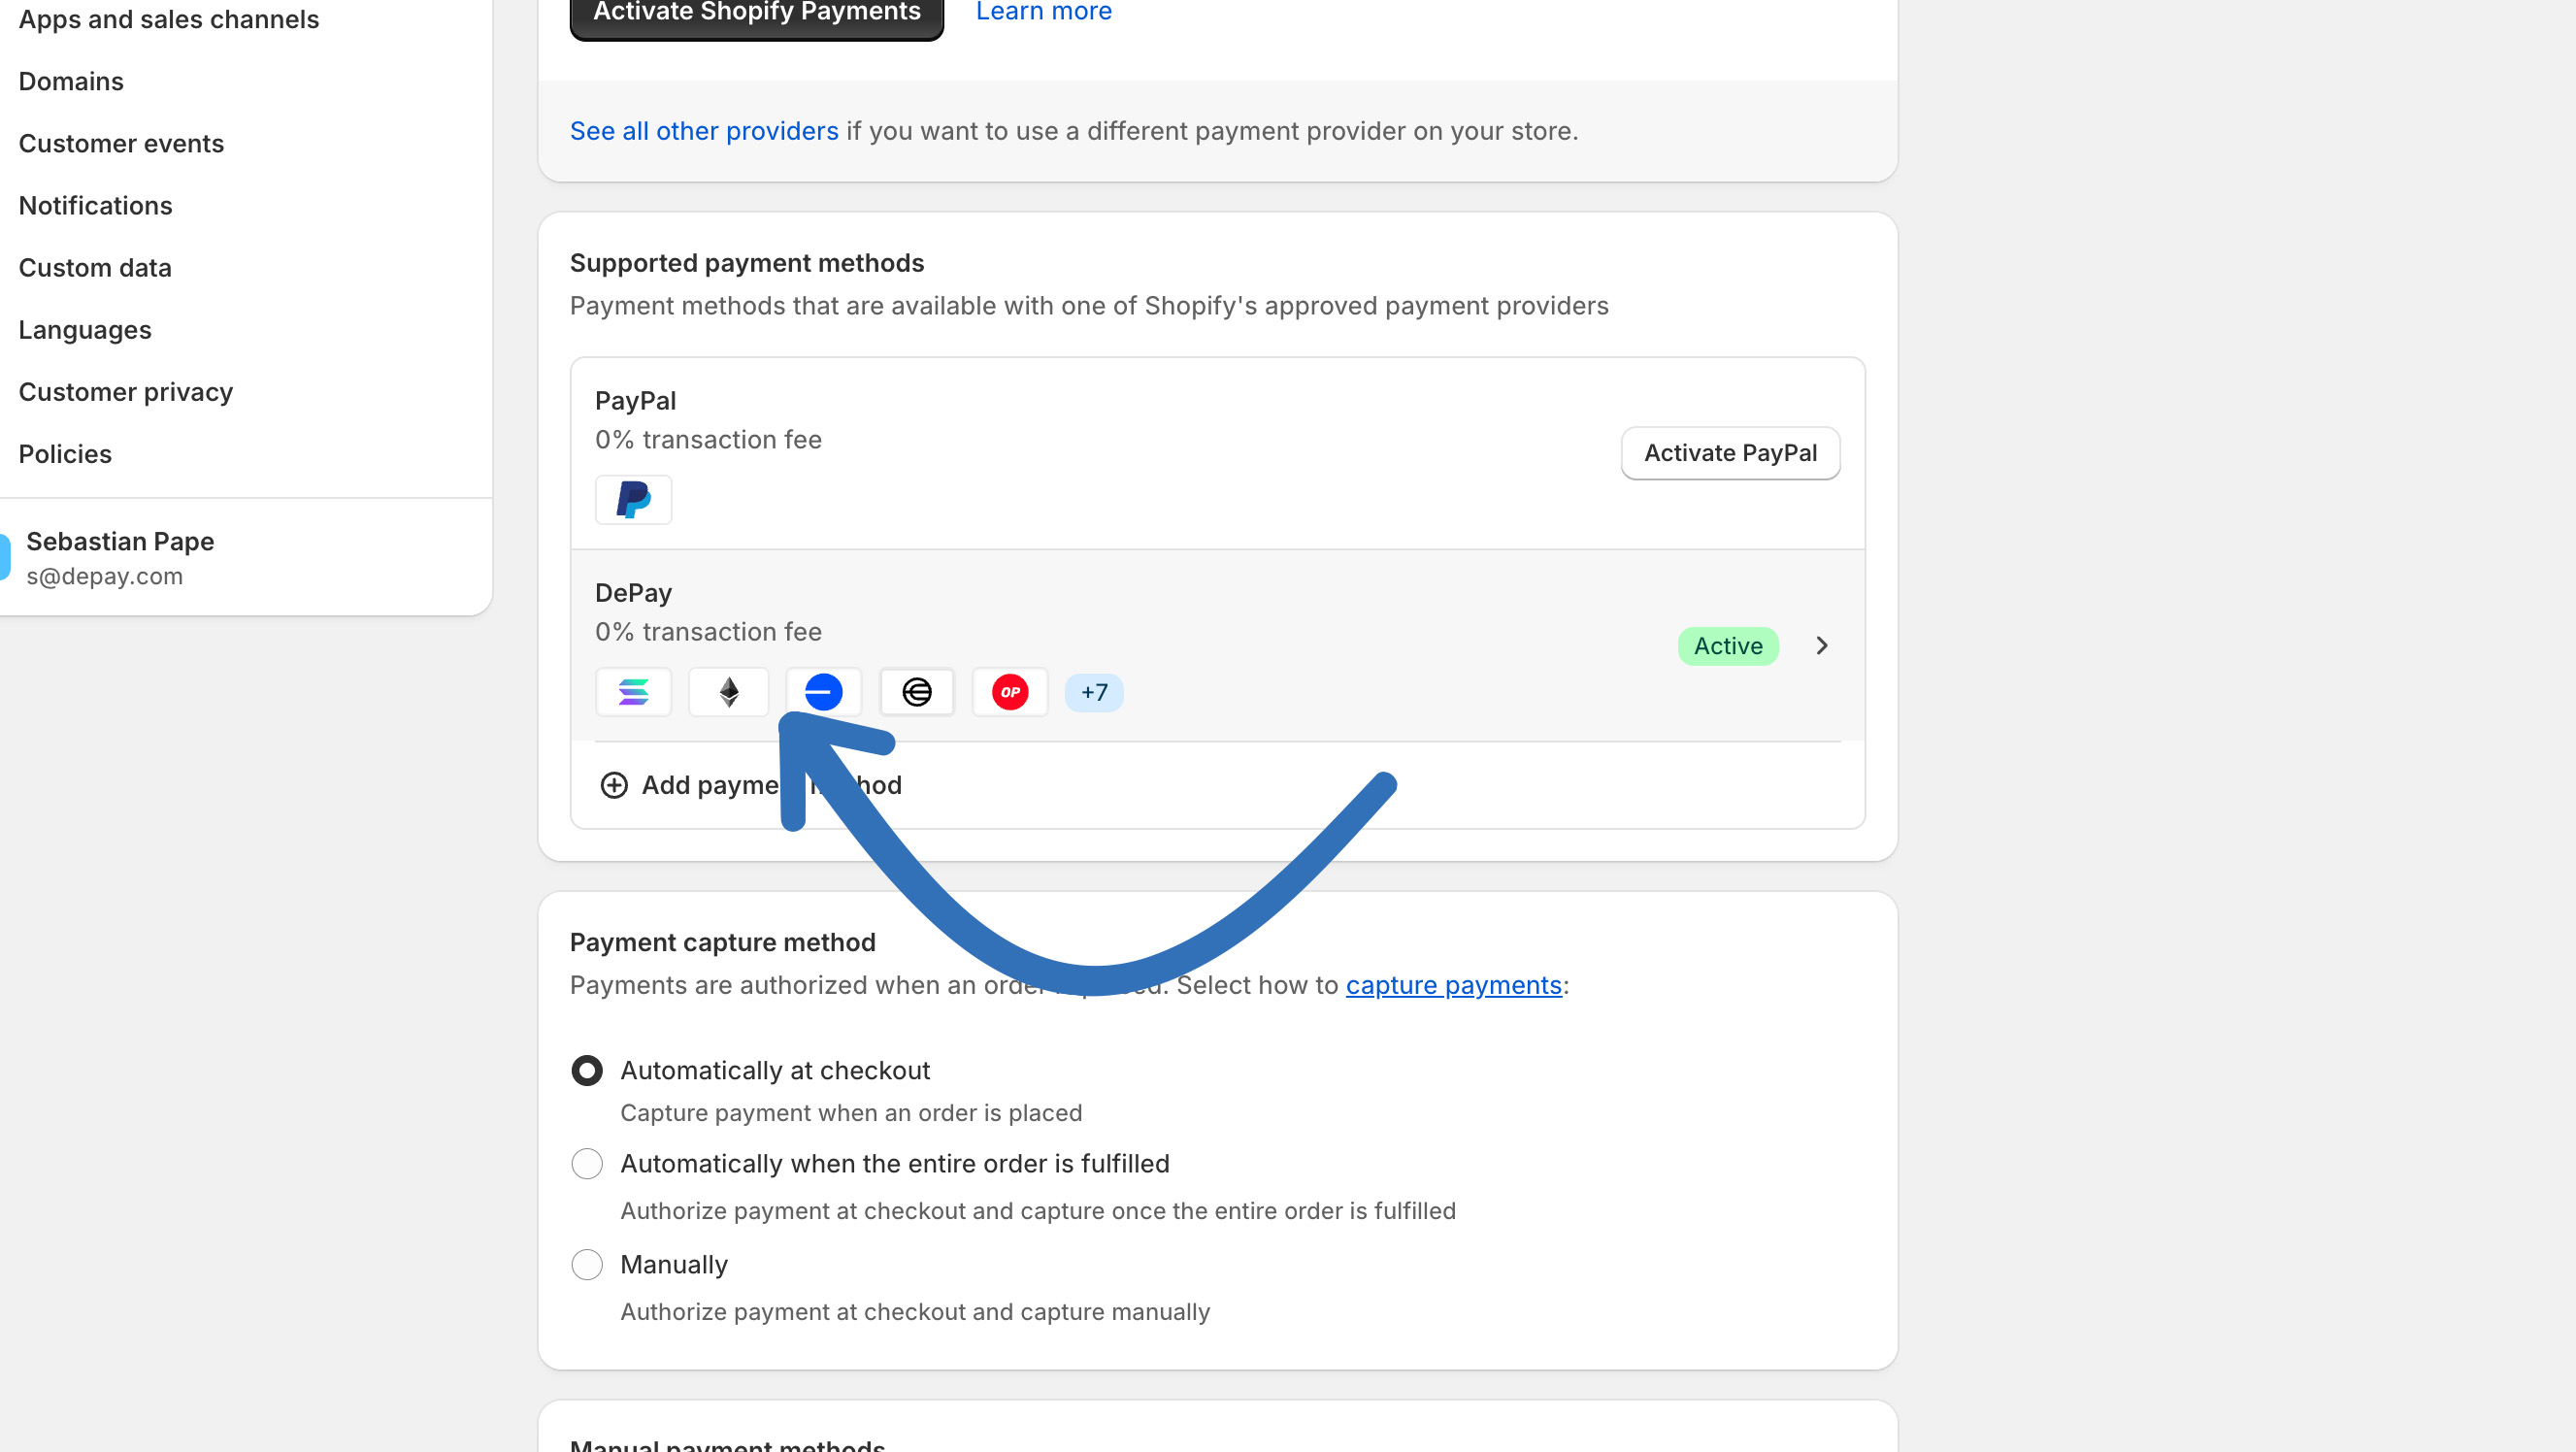
Then open "More Actions" by clicking on it, then choose "Manage":
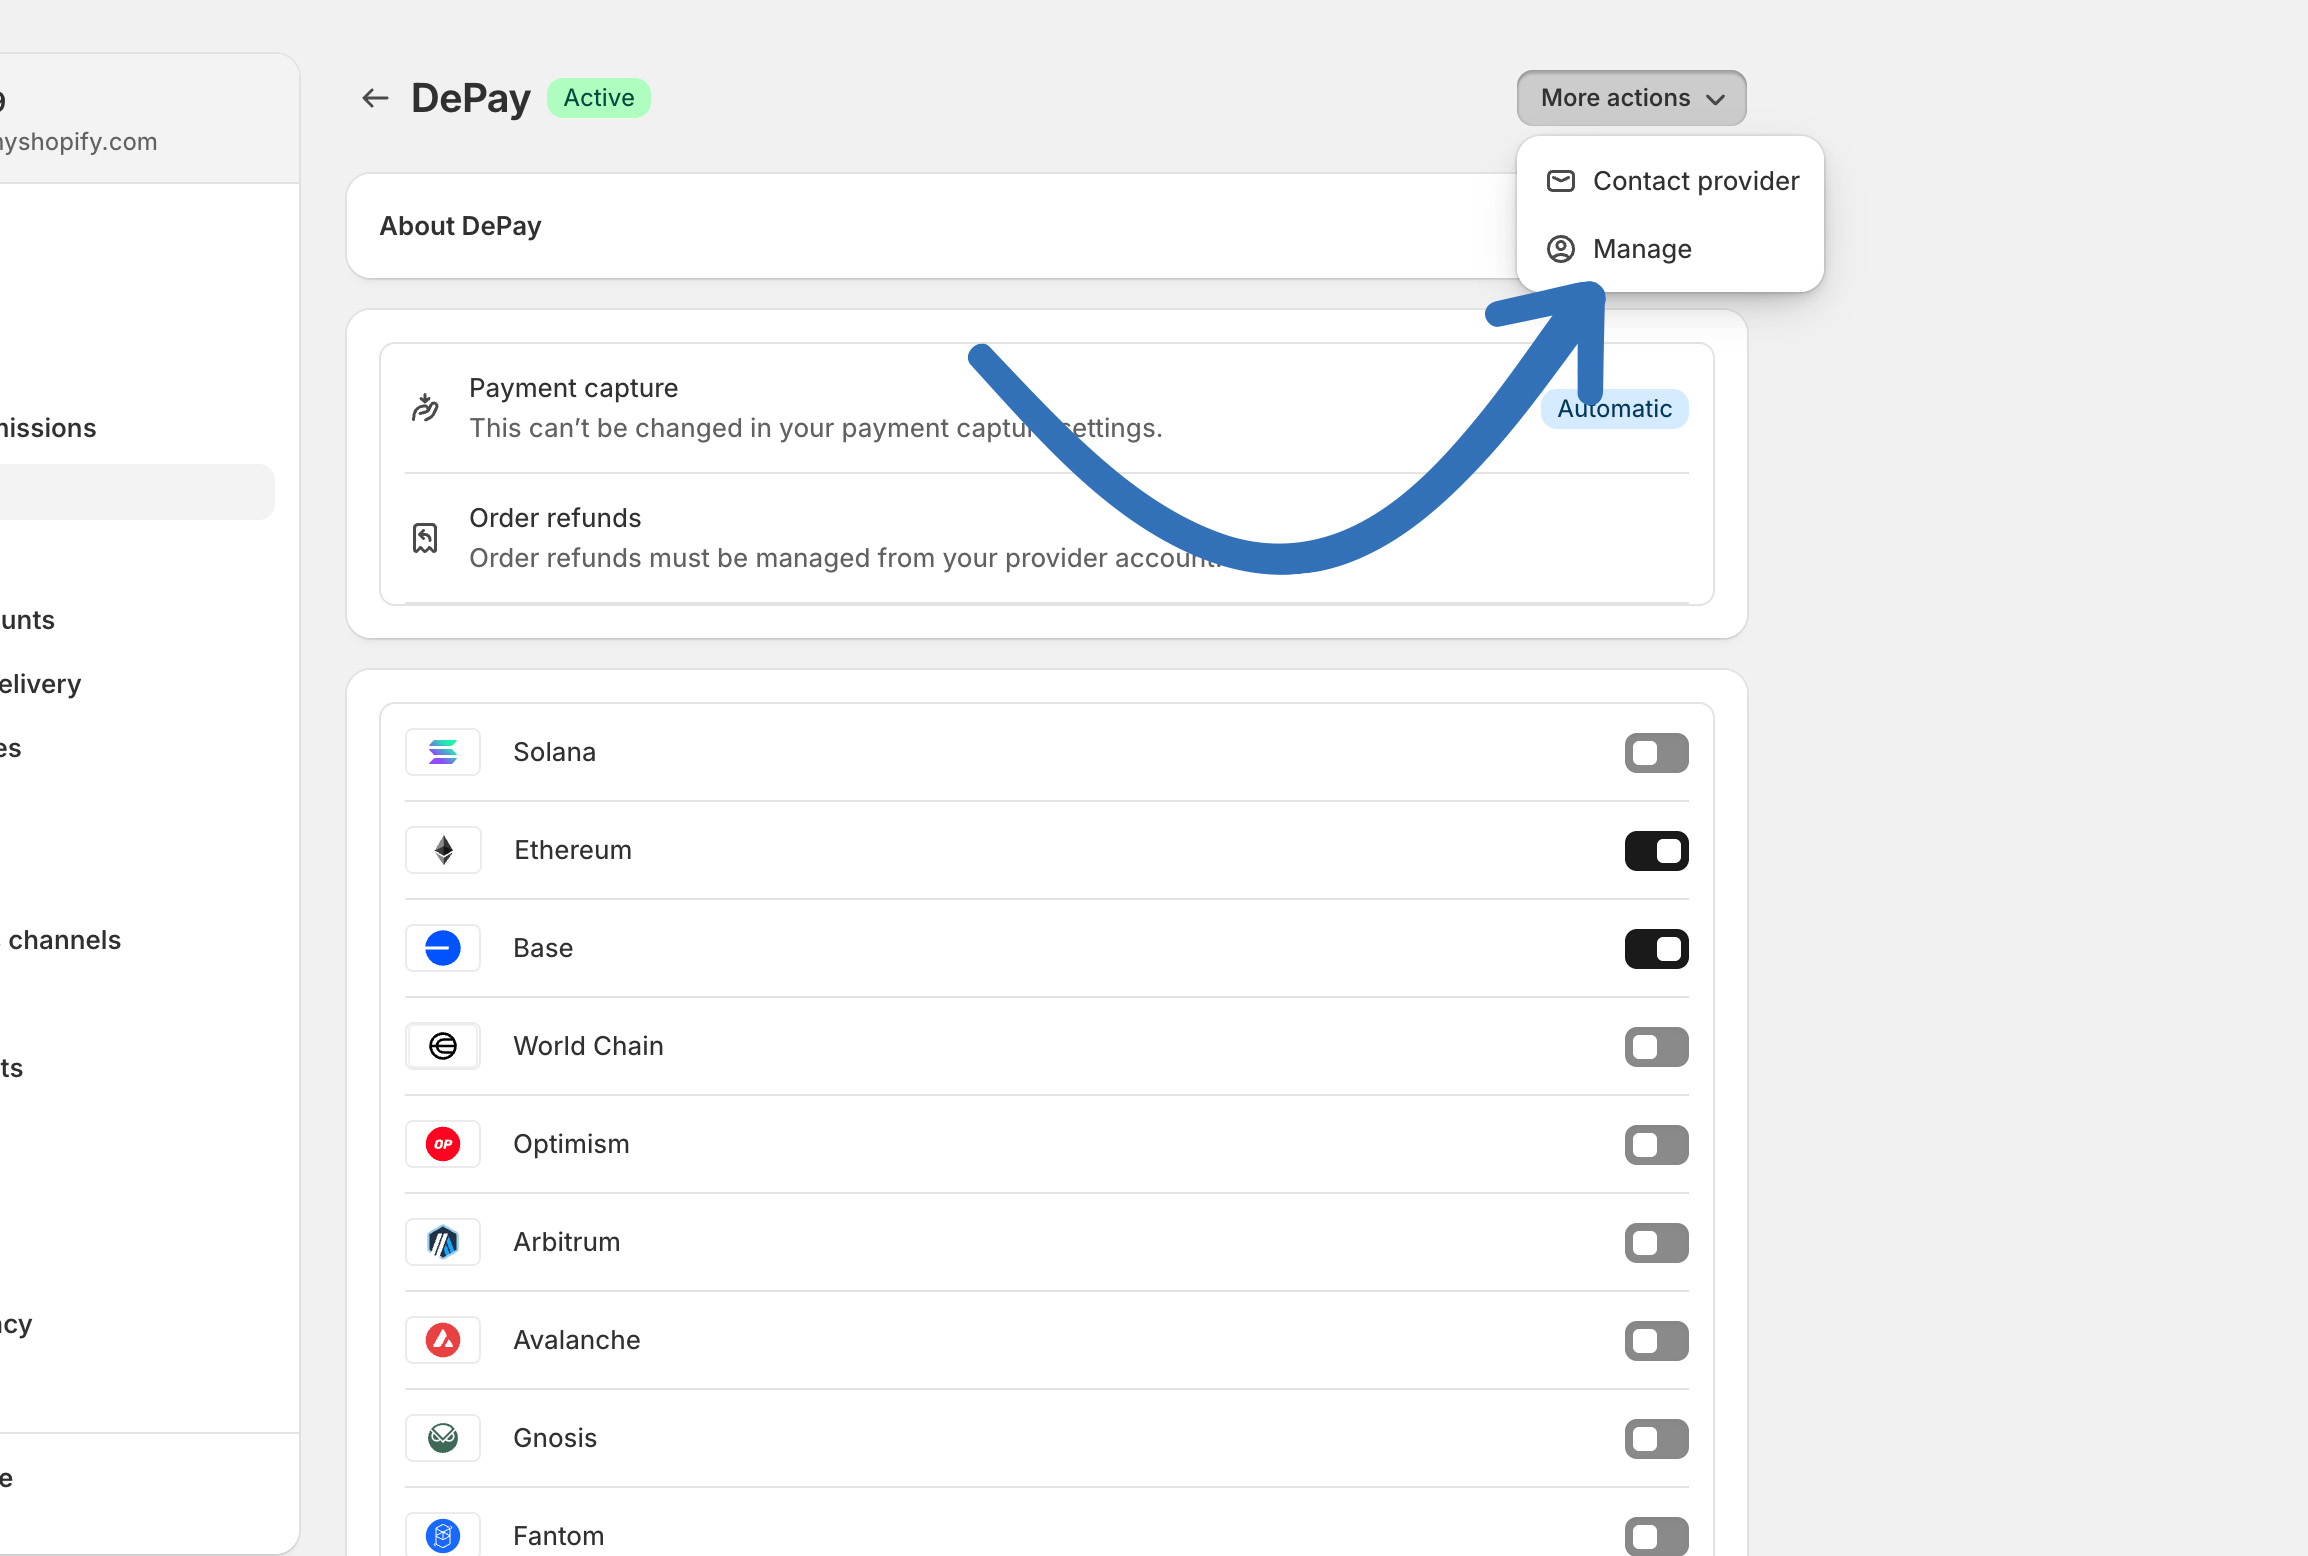
You can now update your payment configuration. Don’t forget to click “Save & Continue” to apply your changes:
Test Mode for Payments
You can activate "Test Mode" for DePay's Shopify Payment Gateway to test how your customers pay for their orders, and to test how you and your staff process those orders.
To enable test mode, go to your Shopify admin at https://admin.shopify.com, then navigate to Settings > Payments > DePay, and toggle on “Test Mode”:
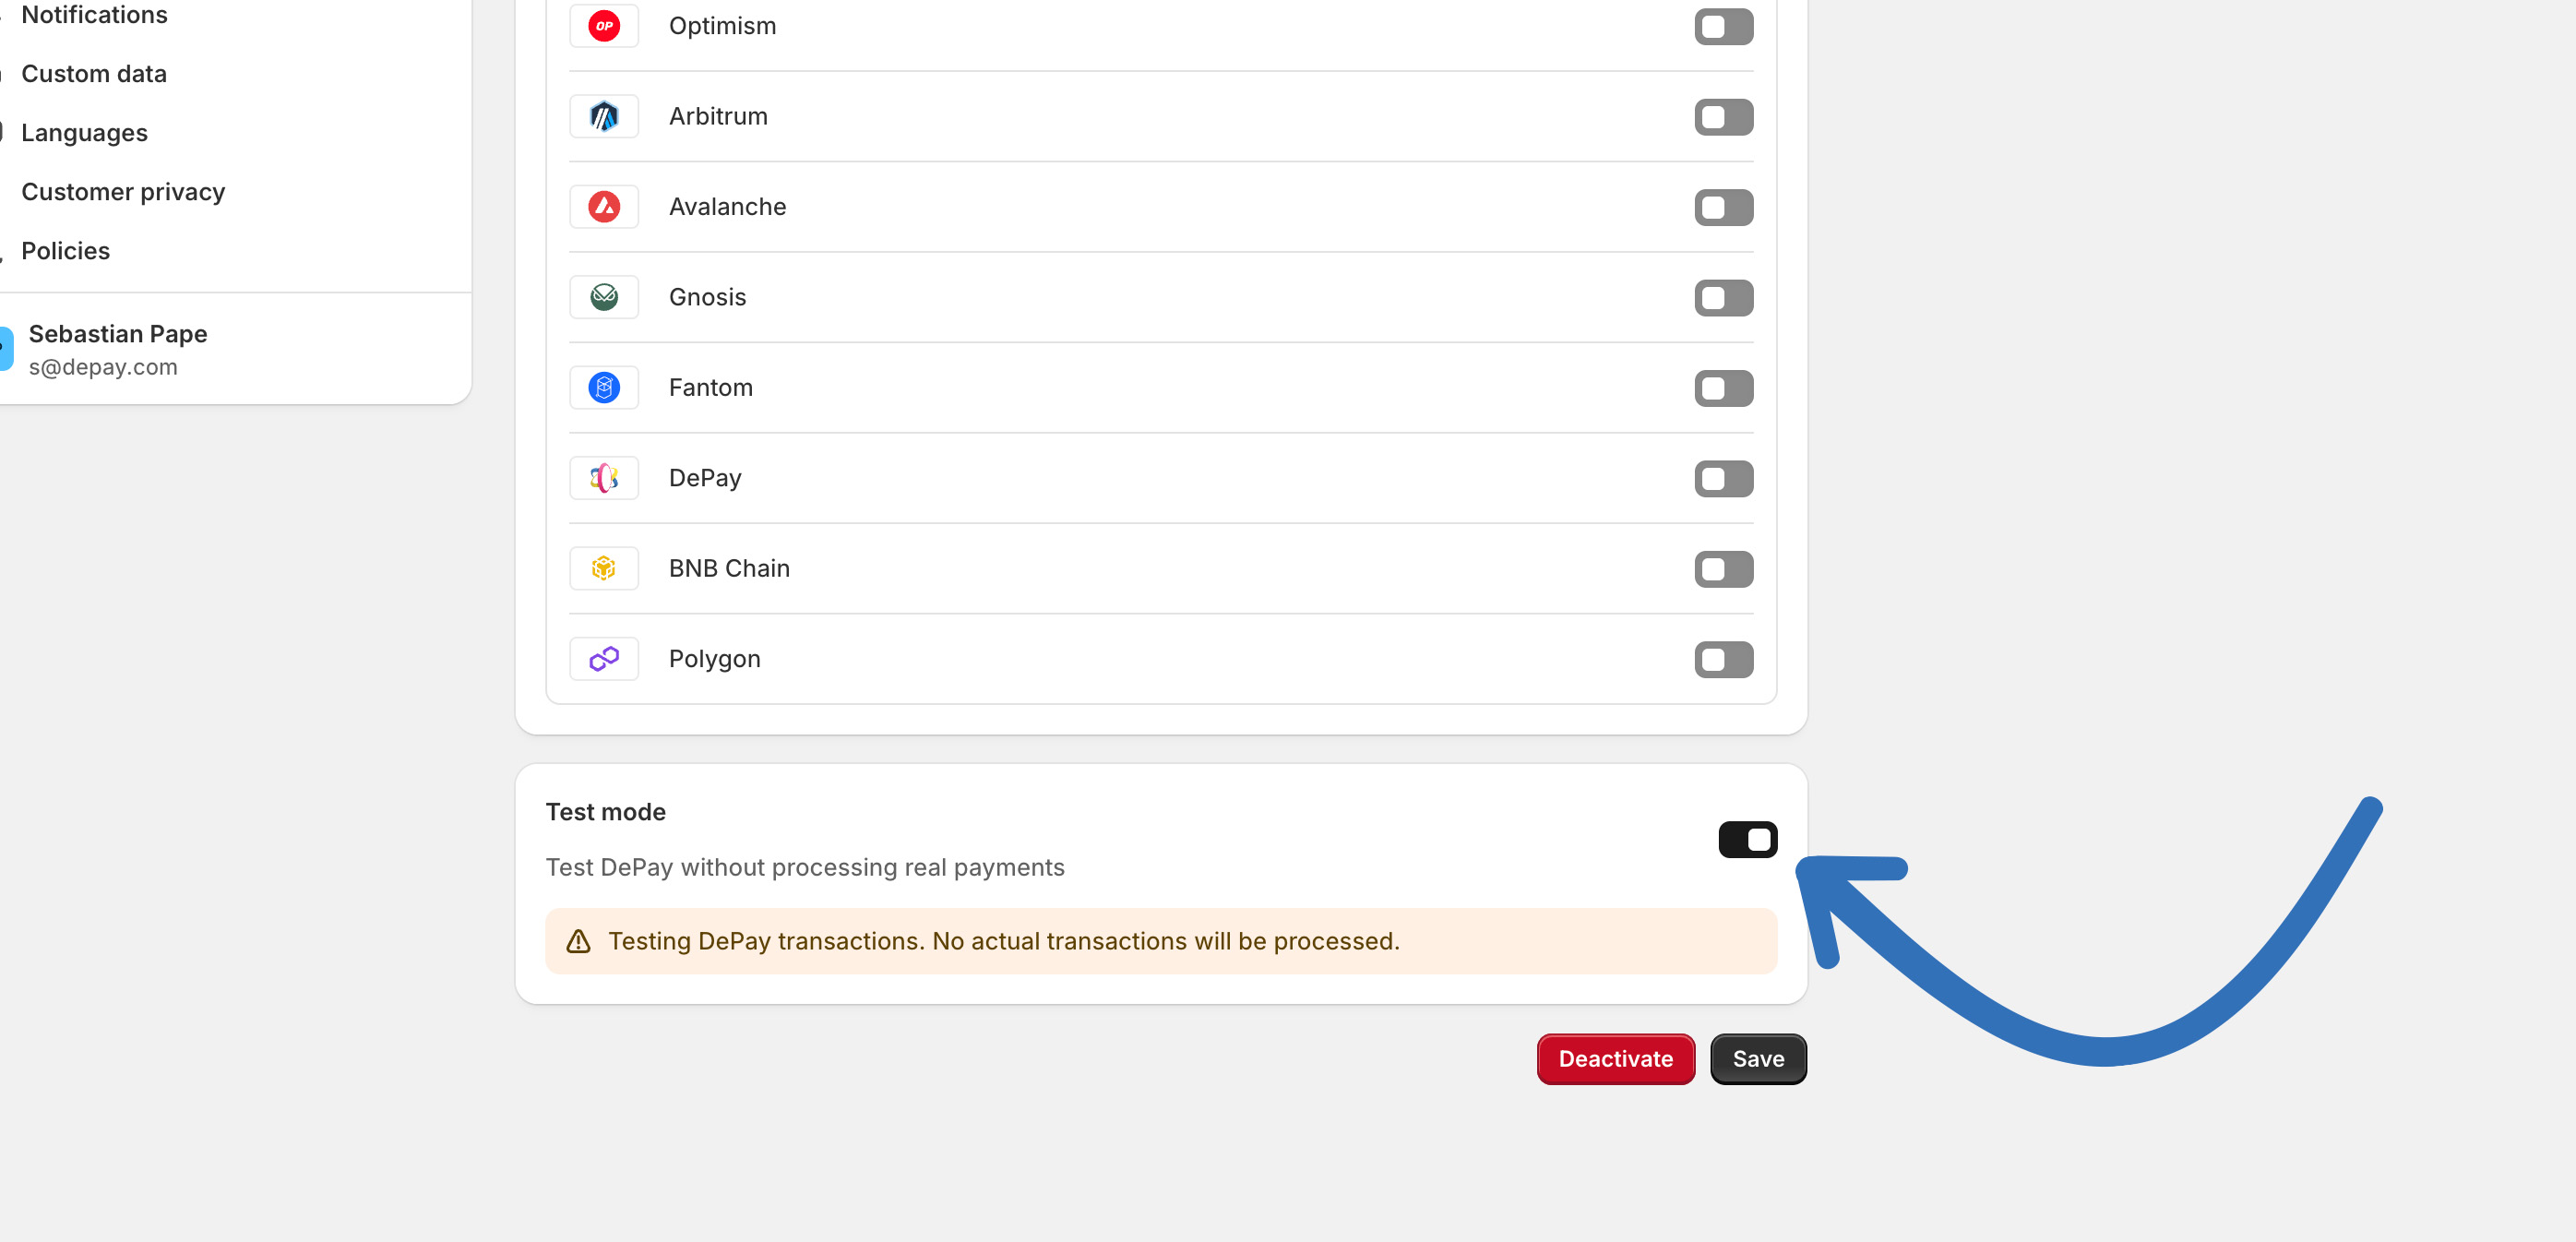
When test mode is enabled, no actual transactions are carried out. However, you can still test the wallet connection and explore the payment suggestion process.
Process Refunds
When processing refunds for Shopify orders paid with crypto via DePay, please follow these steps:
1. Refund the crypto amount to the customer
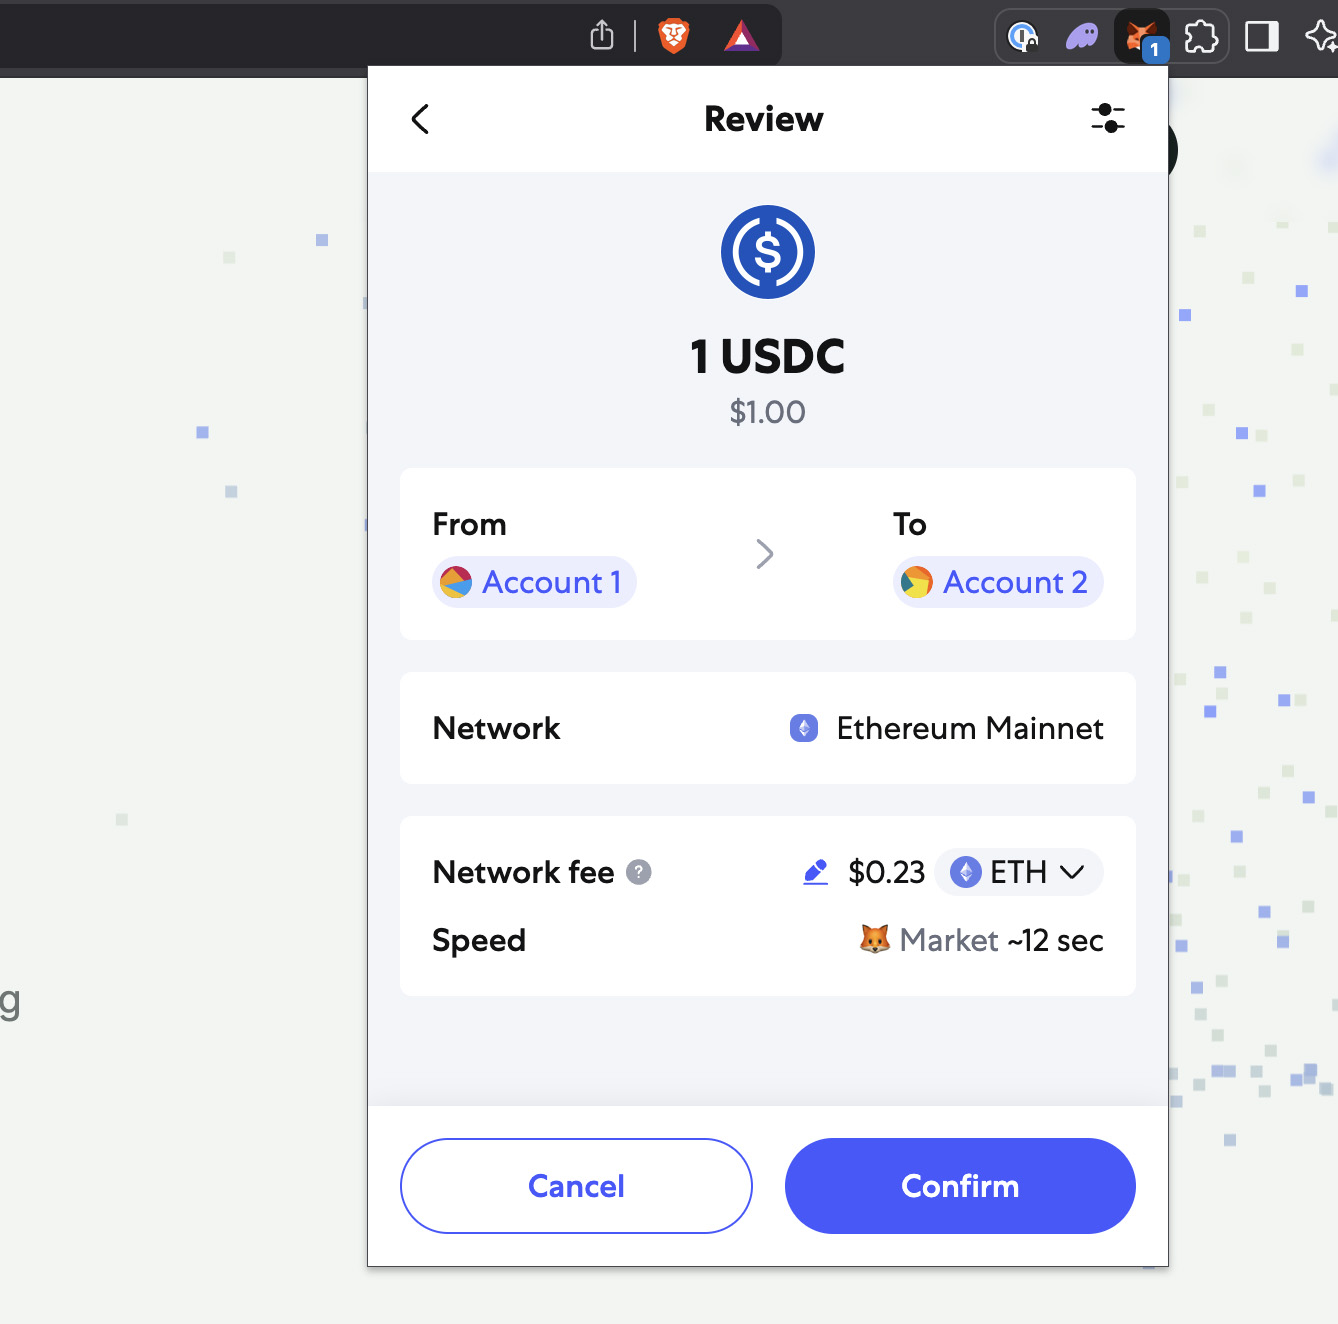
Due to DePay's non-custodial nature, the crypto payment was sent directly to your wallet. Therefore, you must manually execute the refund from your wallet back to the customer.
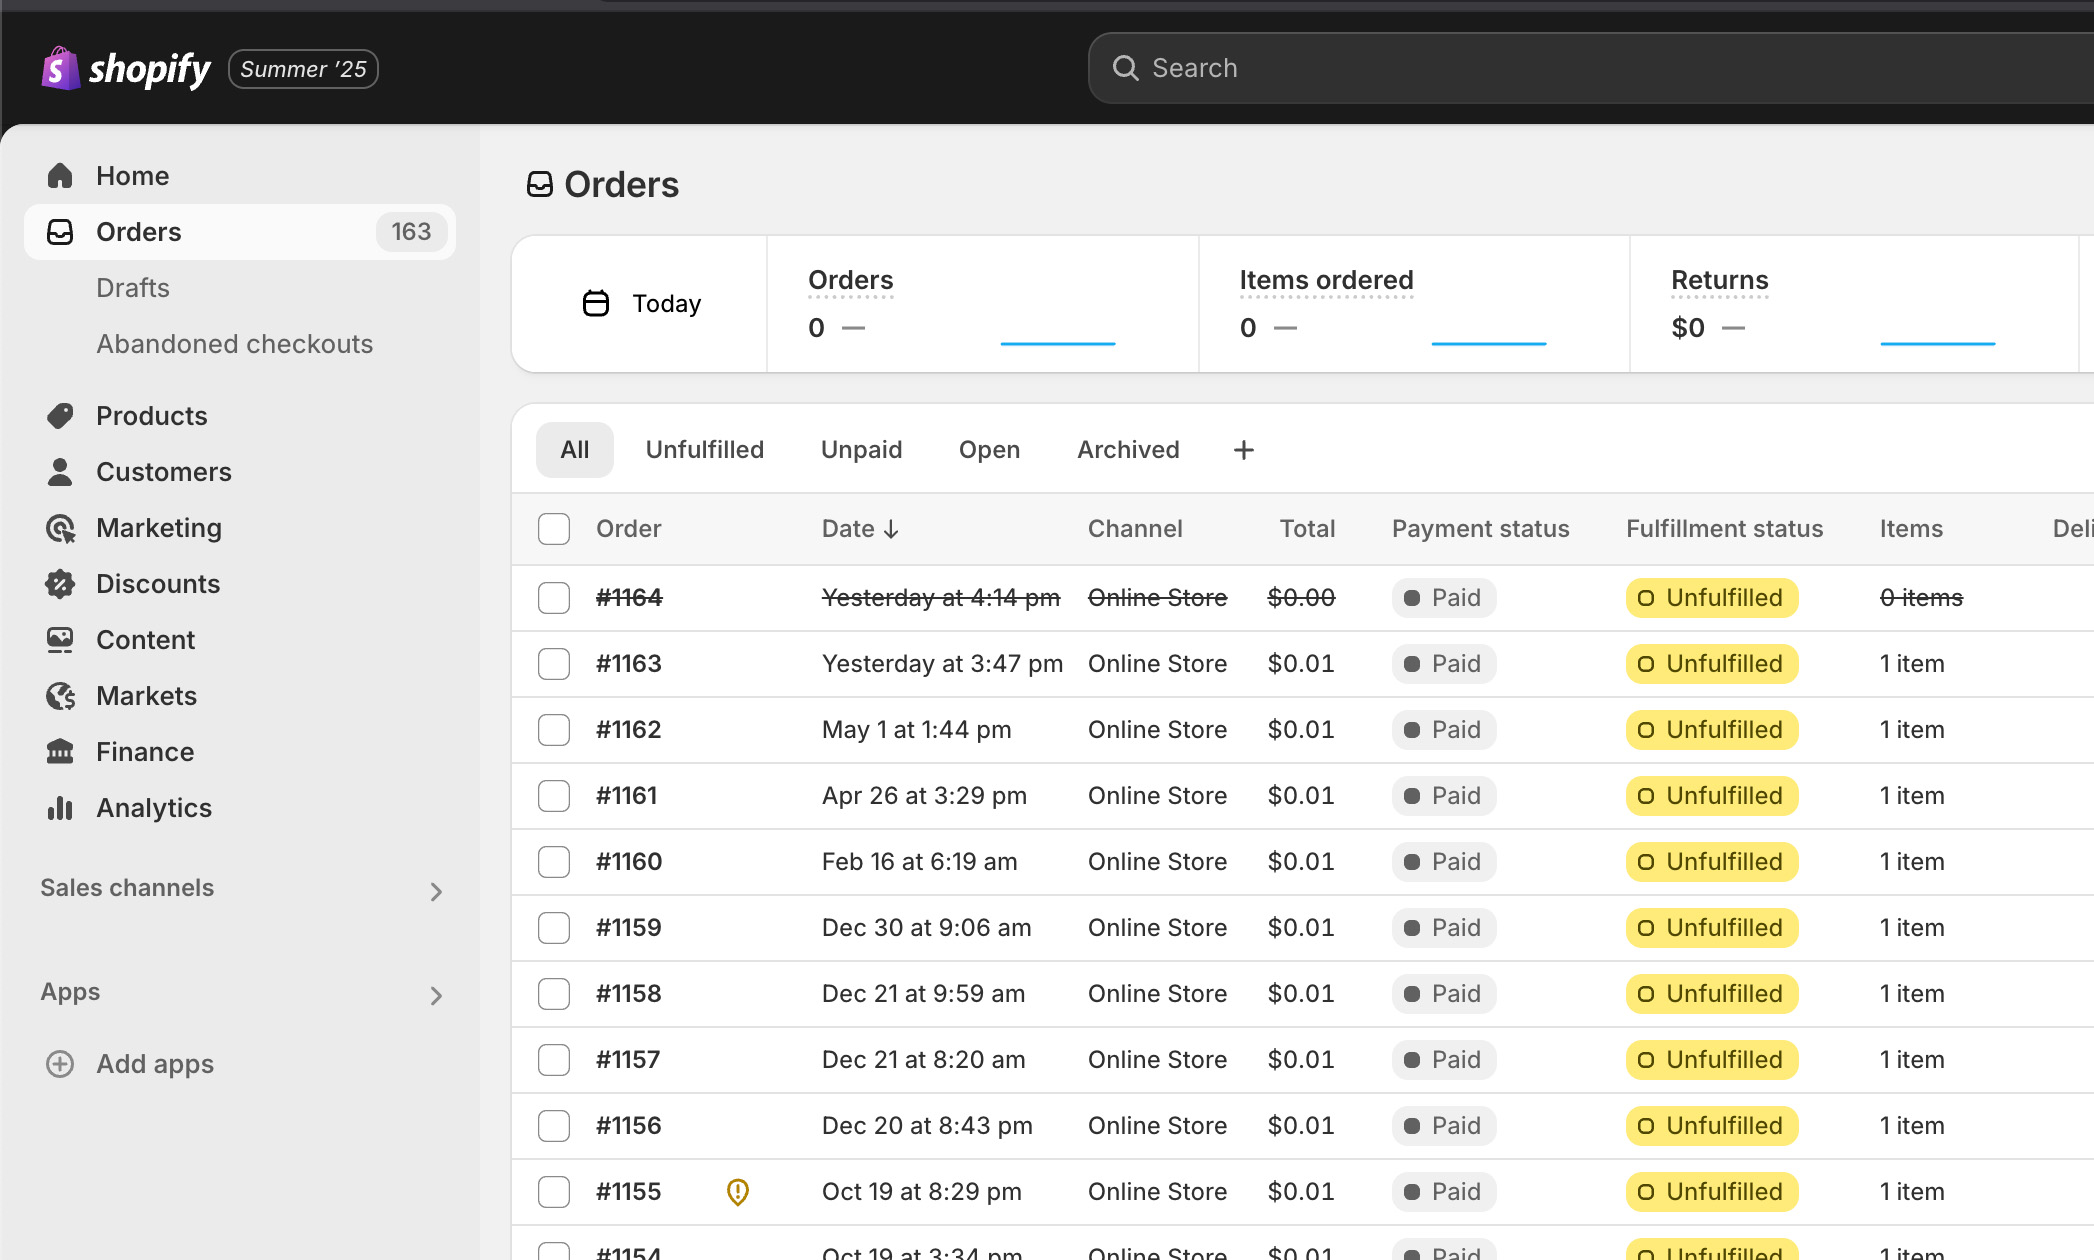
2. Identify the Shopify Order
Open your Shopify Admin Dashboard ("Orders"), locate, and open the order that requires a refund.
3. Cancel the Order in Shopify
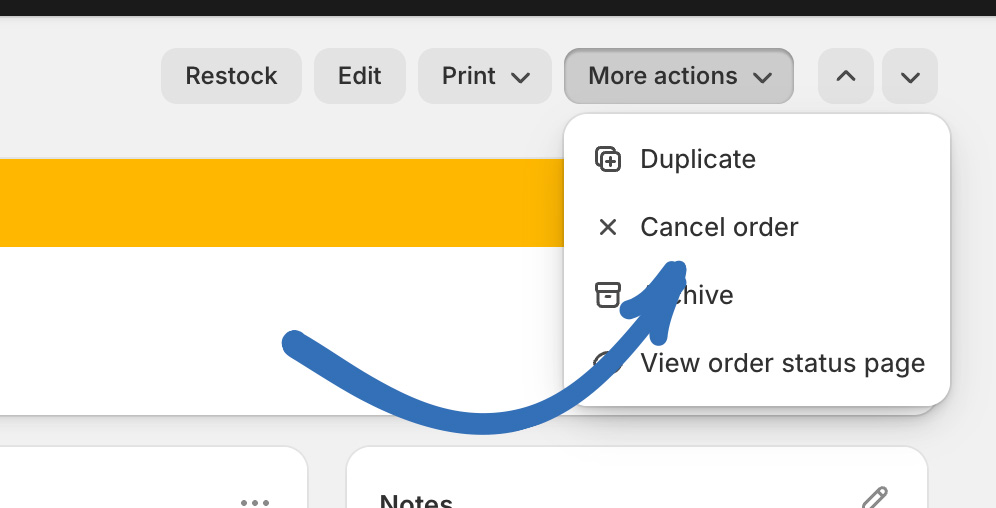
Click "More Actions" and select "Cancel Order".
Choose the reason "Customer changed or canceled order".
Paste a link to the crypto refund transaction into the "Staff note" field for reference.
4. Confirm Cancellation

Click "Cancel order" to finalize the cancellation process.
Payment gateway fees incurred during the original transaction cannot be refunded, even if the order is canceled.