
How to
Accept Web3 Cryptocurrency Payments on WooCommerce
Nov 21, 2022
1. Install the DePay Payments plugin for WooCommerce
First, download the latest plugin zip: Download Here
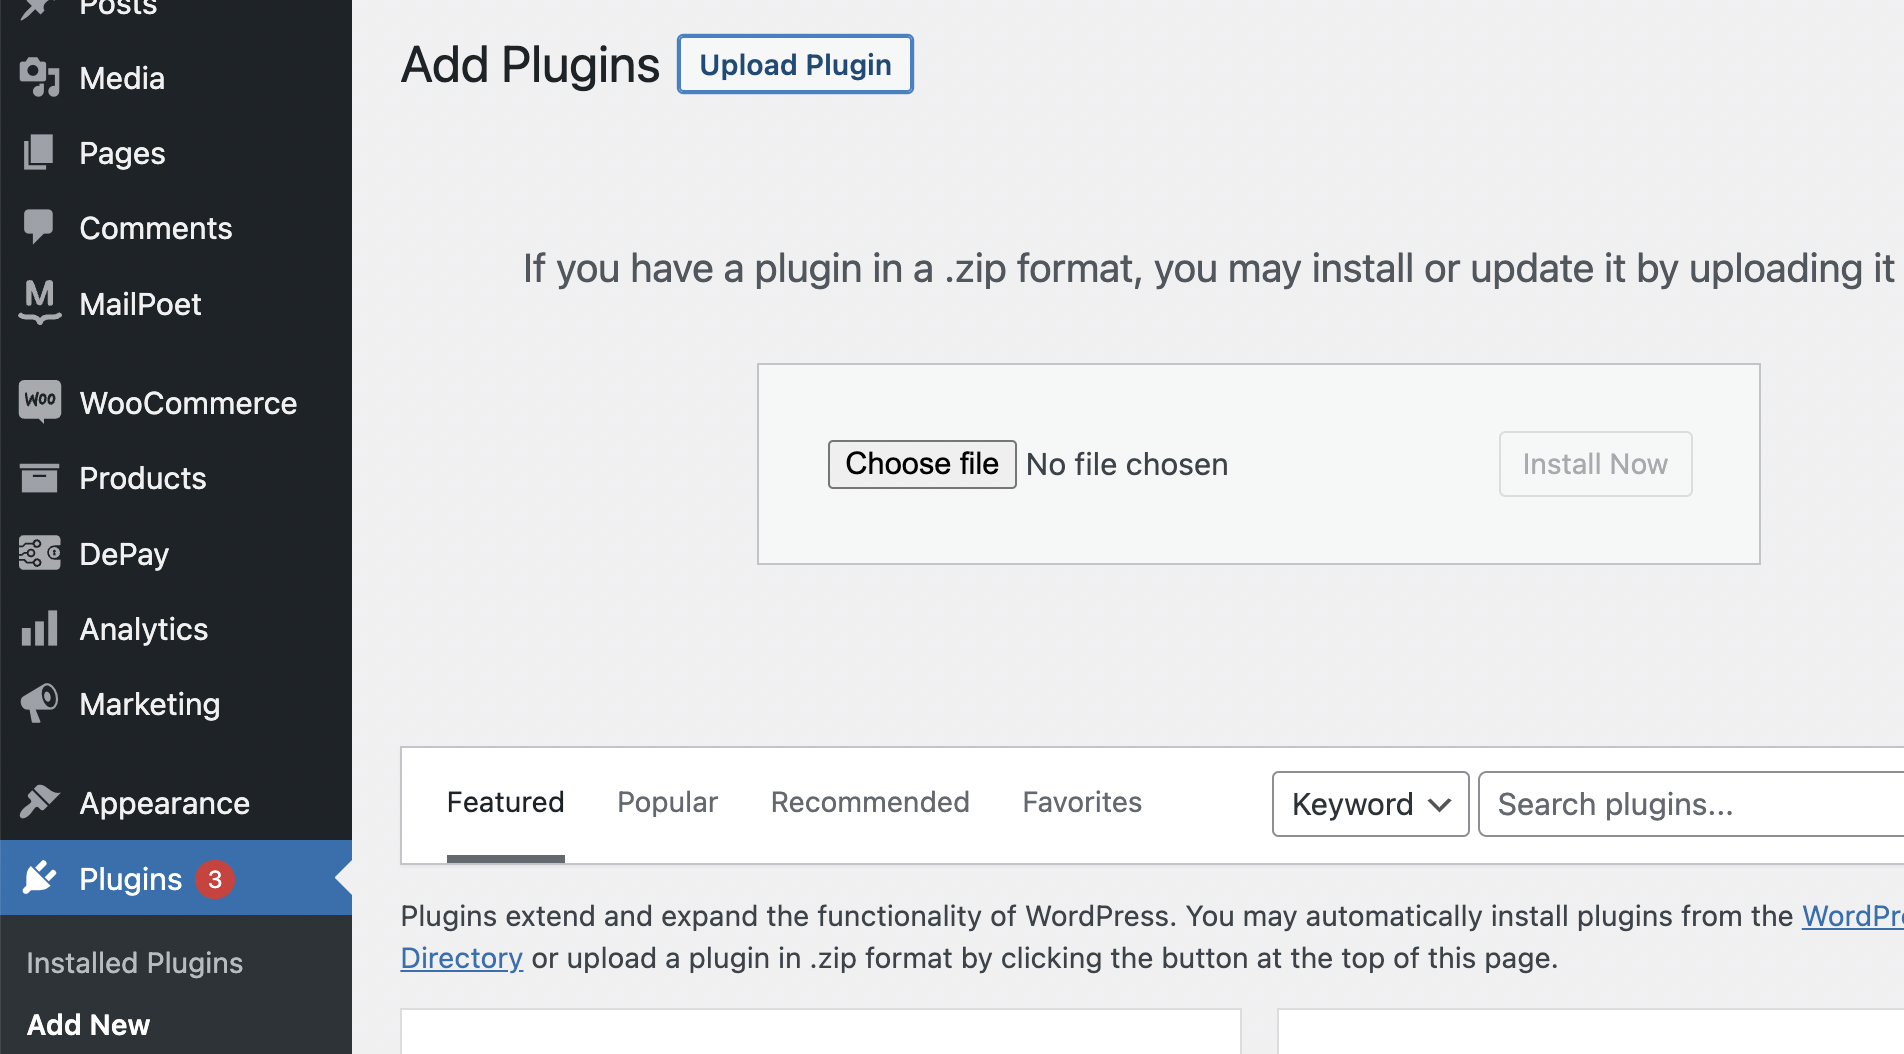
Within your Wordpress admin section navigate to "Plugins".
Then click "Add new".
Then click "Upload Plugin".
Now click "choose file" and upload the plugin zip you downloaded earlier.
Make sure you click "Activate" after the installation has been completed.
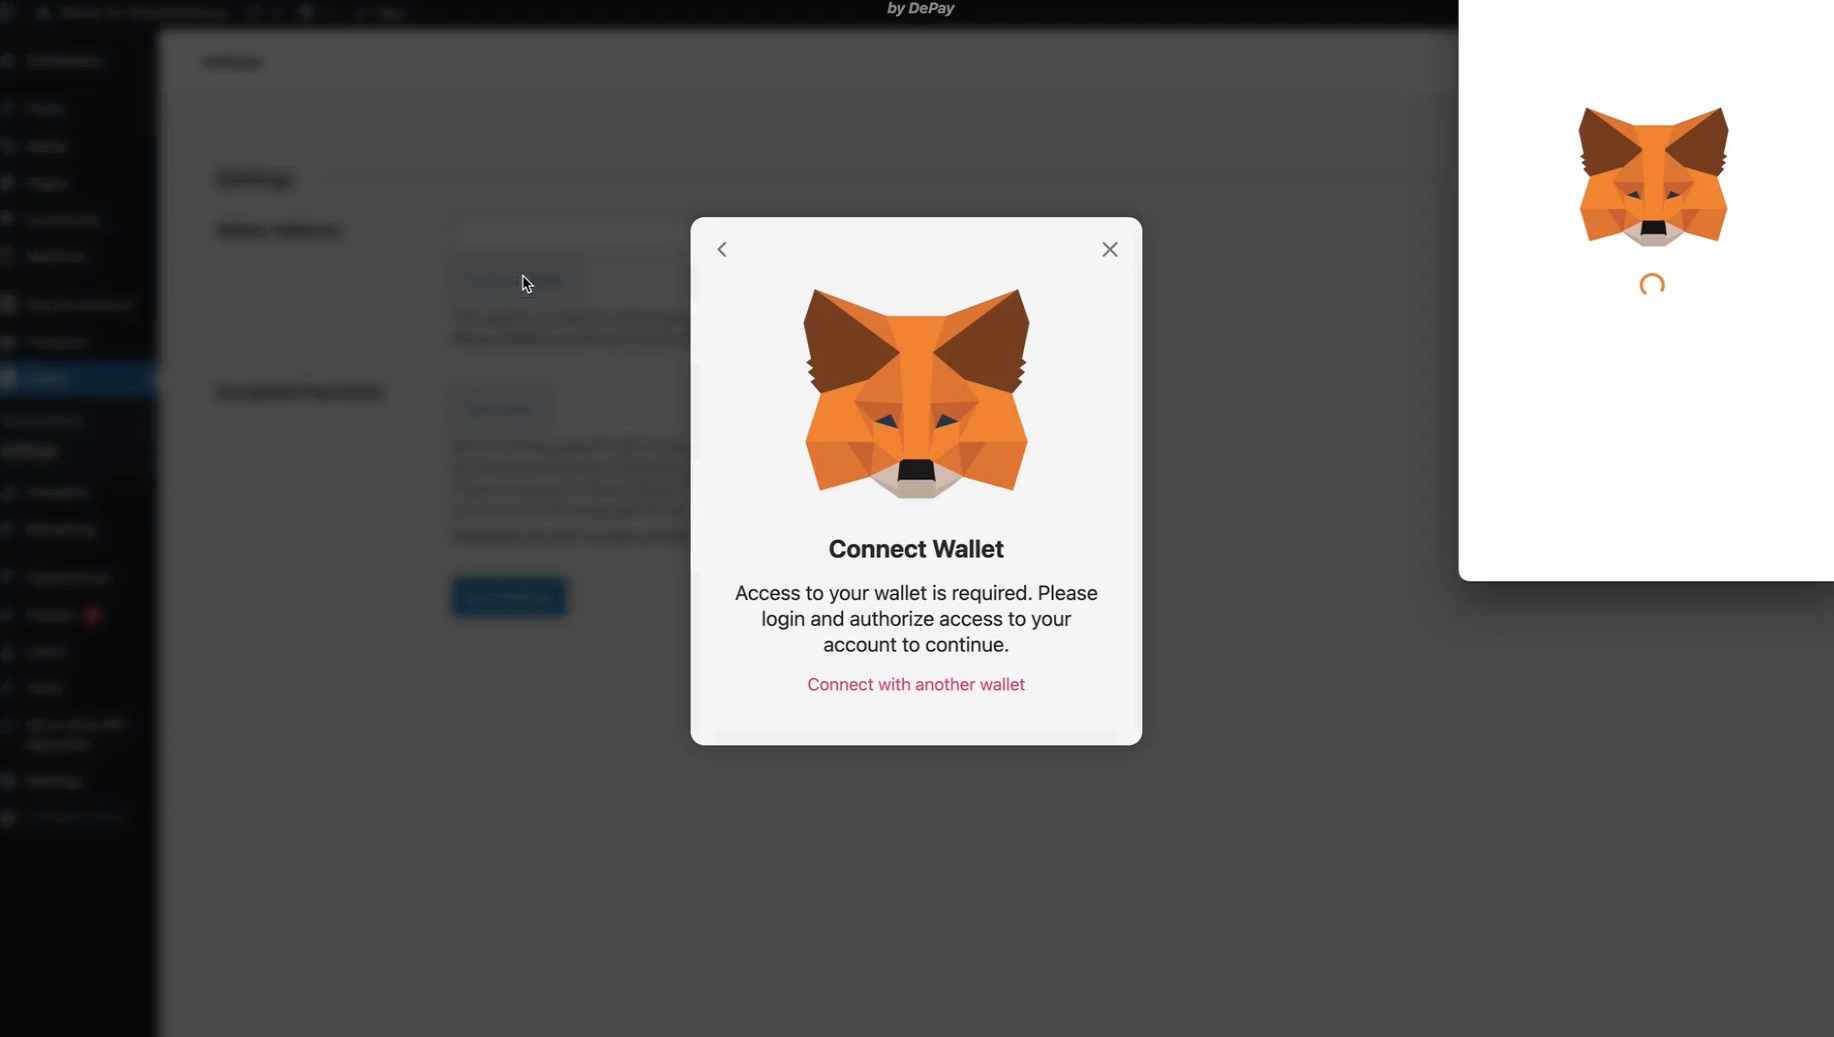
2. Connect your wallet
Navigate to the "DePay" section in your Wordpress admin.
Click the "Connect Wallet" button or enter your wallet address manually.
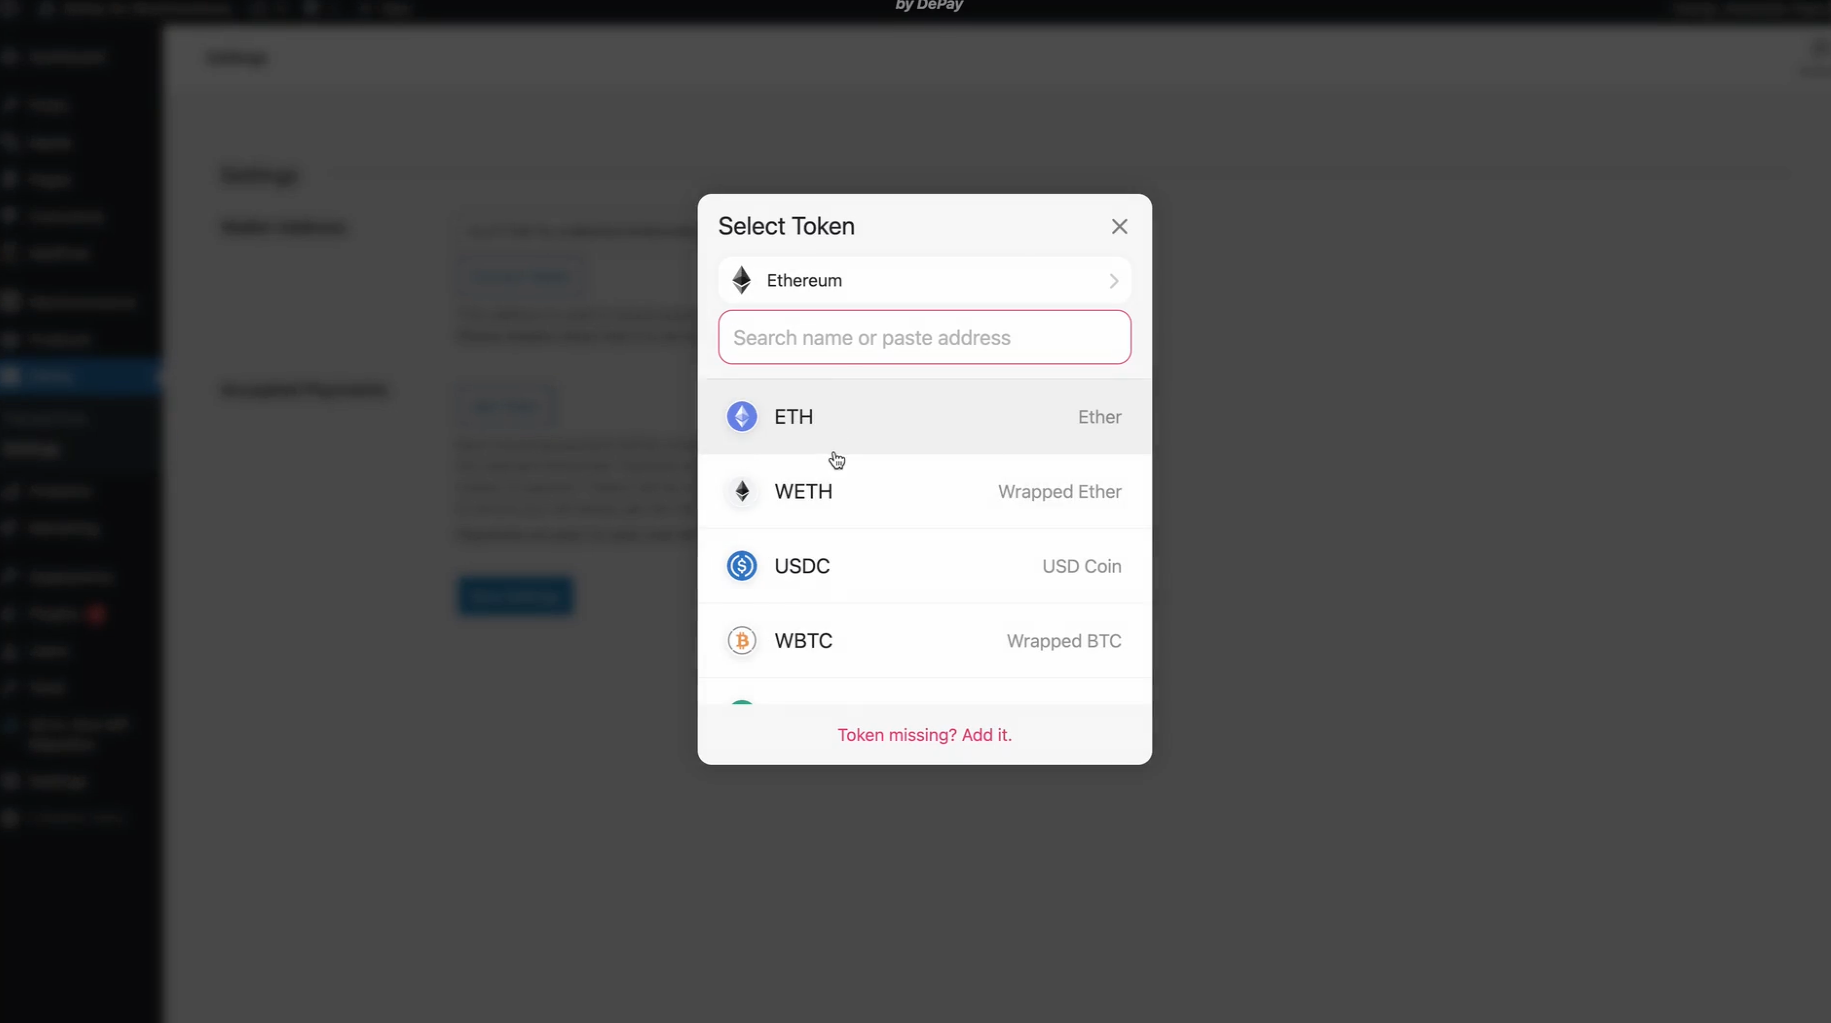
3. Select tokens accepted as means of payment
Now click "Add Token" and add the tokens on the blockchains that you accept as means of payment.
Please make sure to save your settings. Click "Save Settings".
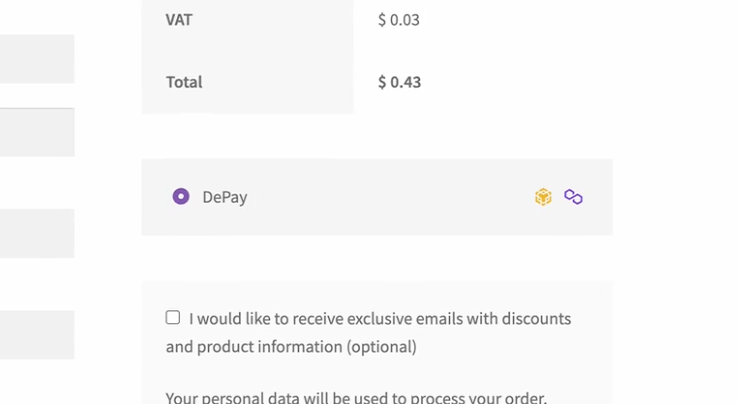
4. Start receiving Web3 Payments from your customers
Once you've configured your wallet address and accepted tokens, DePay will be available as Payment option during your checkout.
Your customers will be able to select DePay as payment option. Once your customers connect their wallet, DePay will suggest the most cost efficient way to perform the payment, convert tokens if required and guide your customers to perform the payment transaction with their wallet.
Once the payment has been confirmed and validated, your customer will be forwarded to the order confirmation.
5. Browse payment transactions
Within the DePay tab of your Wordpress admin, you will find the "Transactions" section.
On the "Transactions" section you will see all past payment transactions including blockchain, transaction id, sender id, receiver id, token id, amounts, and at what point in time the transaction has been confirmed and validated.

Feel free to reach out in order to get additional help: